Mitsubishi Pre Plumbed Cylinder Installation Manual
Installing a Mitsubishi pre-plumbed cylinder correctly is crucial for ensuring the efficiency, safety, and longevity of your hot water system. Whether you are a professional installer or a homeowner attempting a DIY project, understanding the proper installation steps, safety precautions, and maintenance requirements is essential. Pre-plumbed cylinders are designed to simplify the installation process, reduce the risk of leaks, and ensure consistent water pressure and temperature throughout your property. This guide provides a detailed overview of the installation process for a Mitsubishi pre-plumbed cylinder, including preparation, connections, commissioning, and maintenance tips, so that you can achieve a reliable and long-lasting system.
Understanding Mitsubishi Pre-Plumbed Cylinders
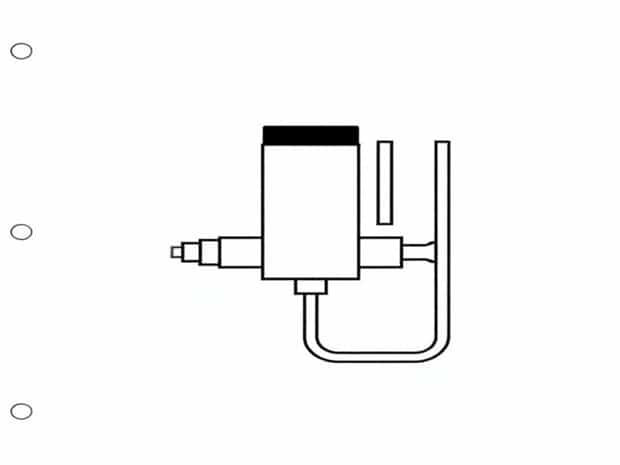
Mitsubishi pre-plumbed cylinders are high-quality hot water cylinders designed for use with heat pump systems or conventional water heating solutions. They come pre-fitted with essential plumbing connections, including inlet and outlet ports, pressure relief valves, and circulation points, making the installation process faster and more straightforward. Pre-plumbed cylinders minimize the risk of installation errors, ensure compatibility with Mitsubishi heat pumps, and provide consistent performance.
Key Features
- Pre-installed plumbing connections for easier installation.
- High-grade stainless steel or coated materials to prevent corrosion.
- Integrated temperature and pressure relief valves for safety.
- Optimized design for efficient heat transfer.
- Compatibility with Mitsubishi heat pumps and auxiliary heating units.
Preparation Before Installation
Before beginning the installation process, it is important to ensure that the site and equipment are prepared. Proper preparation reduces the risk of errors, water leaks, and damage to the cylinder or property.
Site Requirements
- Ensure the cylinder location has sufficient space for installation, maintenance, and future servicing.
- Verify that the floor or mounting surface can support the weight of the full cylinder, as water adds significant mass.
- Ensure adequate access to plumbing and electrical connections.
- Check that ventilation and clearance requirements for heat pump connections are met.
Tools and Materials
Having the right tools and materials on hand will make the installation process smoother and reduce the risk of mistakes. Commonly needed tools include
- Adjustable wrenches and spanners
- Pipe cutters and deburring tools
- PTFE tape or pipe thread sealant
- Screwdrivers and mounting hardware
- Pressure testing equipment
- Pipe insulation materials
Installation Steps
Installing a Mitsubishi pre-plumbed cylinder involves several key steps, from positioning the cylinder to connecting plumbing and commissioning the system. Following the manufacturer’s instructions closely ensures proper operation and safety.
Step 1 Position the Cylinder
Carefully place the cylinder in its designated location. Use a level to ensure it is standing upright and stable. The cylinder should be positioned to allow easy access to all plumbing connections, relief valves, and inspection points.
Step 2 Connect Water Supply and Return Lines
Mitsubishi pre-plumbed cylinders have clearly marked inlet and outlet connections. Connect the cold water supply to the inlet and the hot water outlet to your household plumbing system. Use PTFE tape or approved pipe sealant on threaded connections to prevent leaks. Ensure all joints are tight but avoid over-tightening, which could damage fittings.
Step 3 Install Pressure Relief and Safety Valves
The cylinder comes with integrated temperature and pressure relief valves. Ensure these are correctly installed and connected to a safe discharge point. These valves prevent excessive pressure buildup and overheating, which can damage the cylinder or pose safety hazards.
Step 4 Connect to Heat Pump or Auxiliary Heater
If using a Mitsubishi heat pump, connect the cylinder to the heat pump according to the manufacturer’s specifications. Ensure proper circulation and temperature settings. For auxiliary heaters, follow the recommended electrical and plumbing connections to ensure safe operation.
Step 5 Insulate Pipes and Connections
Insulating hot water pipes reduces heat loss and improves system efficiency. Use suitable pipe insulation materials, covering all hot water lines from the cylinder to the point of use. Ensure insulation does not obstruct valves or fittings.
Commissioning the Cylinder
Once the cylinder is installed, commissioning ensures the system operates safely and efficiently. This includes filling the cylinder, checking for leaks, and setting the correct temperature.
Filling the Cylinder
- Open the cold water supply and allow the cylinder to fill slowly.
- Vent air from the system using bleed valves or taps at high points.
- Check all connections for leaks during filling.
- Verify that the temperature and pressure relief valves operate correctly.
System Testing
- Test the hot water delivery at various outlets to ensure consistent temperature and pressure.
- Check the operation of the heat pump or auxiliary heater.
- Confirm that all safety devices, including pressure relief valves, are functioning properly.
- Document the installation and commissioning for warranty and maintenance records.
Maintenance Tips
Regular maintenance prolongs the life of your Mitsubishi pre-plumbed cylinder and ensures safe operation. Recommended maintenance practices include
Routine Inspections
- Check for leaks or corrosion around connections and fittings.
- Inspect the relief valves and test them periodically.
- Monitor water temperature and pressure to ensure consistent operation.
- Ensure the area around the cylinder is clean and free of obstructions.
Annual Servicing
Engage a qualified professional to perform an annual service, which may include flushing the cylinder to remove sediment, checking the anode rod (if applicable), and verifying the performance of all valves and connections. Regular servicing ensures optimal efficiency and safety, preventing unexpected failures.
Safety Considerations
When installing and maintaining a Mitsubishi pre-plumbed cylinder, safety should always be a top priority. Adhering to local building codes, following manufacturer instructions, and using protective equipment reduces the risk of accidents and damage.
Key Safety Tips
- Always turn off water supply and electrical power before installation or maintenance.
- Handle the cylinder carefully to avoid injury from heavy lifting.
- Ensure relief valve discharge is directed safely away from people and property.
- Do not bypass safety devices or attempt unauthorized modifications.
- Follow all local plumbing and electrical regulations.
Installing a Mitsubishi pre-plumbed cylinder requires careful planning, attention to detail, and adherence to safety guidelines. By preparing the site, using proper tools, following step-by-step installation instructions, and commissioning the system correctly, you can ensure a reliable and efficient hot water supply. Regular maintenance and inspections help preserve the cylinder’s longevity and maintain safe operation. Whether connected to a Mitsubishi heat pump or an auxiliary heater, a pre-plumbed cylinder simplifies the installation process while providing high performance and peace of mind for homeowners and professionals alike.