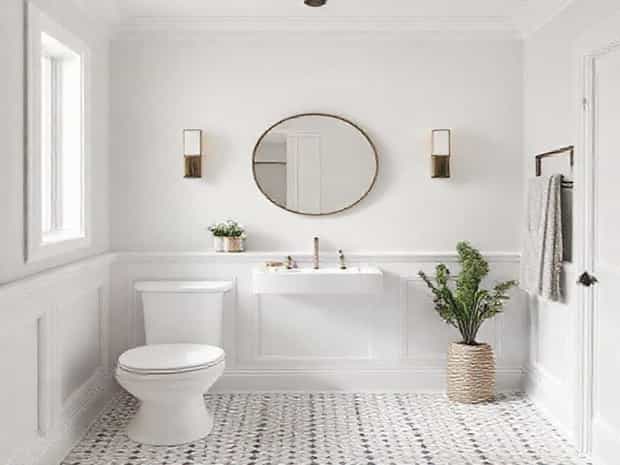
Install Wainscoting In Bathroom
Adding wainscoting to a bathroom can dramatically transform the space, giving it a refined and timeless appearance. Wainscoting not only adds visual appeal but also provides practical benefits such as protecting walls from moisture and damage in high-traffic areas. Installing wainscoting in a bathroom requires careful planning, precise measurement, and the right materials to ensure durability and a professional finish. Whether opting for traditional wood panels, moisture-resistant PVC, or modern MDF boards, the process can be straightforward if approached methodically. Understanding each step of the installation process will help homeowners achieve a polished look while maximizing functionality and style.
Choosing the Right Wainscoting for Bathrooms
Not all wainscoting materials are suitable for bathrooms due to high humidity and occasional water exposure. Selecting the right material ensures longevity and prevents warping, swelling, or mold growth. Common options include
- Moisture-Resistant MDFMedium-density fiberboard treated for damp environments, easy to paint and finish.
- PVC PanelsCompletely waterproof, lightweight, and simple to maintain.
- Vinyl WainscotingDurable, flexible, and ideal for modern bathroom designs.
- Wood PanelsTraditional look, best with water-resistant finishes or in bathrooms with good ventilation.
Consider the overall style of the bathroom and existing décor when choosing the type of wainscoting. Classic beadboard is popular for a cottage or traditional style, while flat panels suit modern and minimalistic designs.
Tools and Materials Needed
Proper preparation involves gathering the right tools and materials to ensure a smooth installation. Essentials include
- Wainscoting panels or boards of chosen material
- Measuring tape and level
- Construction adhesive suitable for bathrooms
- Nail gun or finishing nails
- Caulking gun and water-resistant caulk
- Paint or sealant for finishing
- Sandpaper or sanding block
- Stud finder (optional)
Having all materials and tools ready reduces the risk of mistakes and ensures a professional result.
Preparing the Bathroom Walls
Preparation is key for a successful wainscoting installation. Walls should be clean, dry, and free of mold or mildew. Steps include
- Clean walls with mild detergent to remove dirt and grease.
- Repair any holes or cracks using appropriate filler.
- Measure the height of the wainscoting, typically 32 to 42 inches from the floor.
- Mark the desired height using a pencil and level for a straight guideline.
- Remove any baseboards or existing trim that may interfere with installation.
Taking the time to prepare walls properly ensures that panels adhere correctly and remain level.
Installing the Wainscoting Panels
Step 1 Cutting Panels to Size
Measure the length of each wall section and cut the panels accordingly. Use a miter saw or circular saw for precise cuts. For corners and edges, angle cuts may be necessary to achieve a seamless fit.
Step 2 Applying Adhesive
Apply a generous amount of construction adhesive to the back of each panel. Adhesive provides additional strength and helps prevent panels from separating over time. Press the panel firmly against the wall along the guideline marked earlier.
Step 3 Securing Panels
Use a nail gun or finishing nails to secure the panel to the wall studs. Ensure nails are evenly spaced and countersink them slightly to allow for a smooth finish. If studs are not accessible, adhesive alone can hold lightweight panels, but additional support is recommended for durability.
Step 4 Handling Corners and Transitions
For inside corners, cut panels at a 45-degree angle to create a tight, clean joint. Outside corners may require corner trim or molding to cover gaps and provide a polished look. Use caulk to fill small gaps and ensure a seamless appearance.
Adding Trim and Finishing Touches
Trim and molding enhance the aesthetic and provide a professional finish. Consider baseboards, chair rails, or crown molding depending on the style of wainscoting chosen.
- Install baseboards at the bottom to cover gaps between panels and the floor.
- Add chair rails at the top edge of the panels for a traditional look.
- Use water-resistant caulk along seams, corners, and edges to prevent moisture from entering behind panels.
- Sand surfaces lightly to remove rough edges or imperfections.
- Apply paint or waterproof sealant to protect the panels and enhance visual appeal.
Painting and Sealing Wainscoting
Painting wainscoting not only adds style but also protects the material from bathroom humidity. Steps for a professional finish include
- Apply a primer suitable for the panel material to ensure paint adhesion.
- Use water-resistant or semi-gloss paint to withstand moisture and simplify cleaning.
- Allow sufficient drying time between coats for a smooth finish.
- Seal edges with waterproof sealant if the panels are adjacent to showers or sinks.
Proper painting and sealing enhance both the appearance and longevity of bathroom wainscoting.
Maintenance and Care
Maintaining wainscoting in a bathroom is relatively simple if moisture is controlled. Regular cleaning with mild detergent, wiping spills immediately, and ensuring proper ventilation reduces the risk of damage. Avoid harsh chemical cleaners that can degrade the paint or panel material. Inspect panels periodically for loose nails, gaps, or signs of moisture and address them promptly to preserve the beauty and function of the wainscoting.
Installing wainscoting in a bathroom combines aesthetic appeal with practical benefits, protecting walls from moisture while enhancing interior design. By carefully selecting the right materials, preparing walls, and following proper installation techniques, homeowners can achieve a professional, long-lasting result. Trim, caulking, painting, and sealing are crucial finishing steps that ensure the wainscoting remains durable and stylish. With thoughtful planning and attention to detail, bathroom wainscoting can transform an ordinary space into a sophisticated and elegant environment, providing both function and charm for years to come.
- Choose moisture-resistant materials like PVC, MDF, or treated wood for bathroom wainscoting.
- Prepare walls by cleaning, repairing, and marking panel height.
- Cut panels accurately and apply construction adhesive before securing with nails.
- Handle corners and transitions with careful cuts and trim for a seamless look.
- Add baseboards, chair rails, and molding to complete the aesthetic.
- Paint with water-resistant or semi-gloss finishes and seal edges to prevent moisture damage.
- Maintain wainscoting with regular cleaning, proper ventilation, and inspection for gaps or loose panels.
- Proper installation and care ensure a stylish, durable, and functional bathroom upgrade.