Install Sink Tailpiece Extension
Plumbing projects around the home can often seem intimidating, but with the right approach, they become manageable and even satisfying to complete. One common task homeowners face is connecting their sink drain properly, especially when the existing plumbing does not line up perfectly. This is where a sink tailpiece extension comes in handy. Installing a sink tailpiece extension ensures your drain reaches the trap correctly, preventing leaks and allowing water to flow smoothly. Learning how to install a sink tailpiece extension is a practical skill that can save you both time and money while improving the function of your bathroom or kitchen sink.
Understanding the Sink Tailpiece Extension
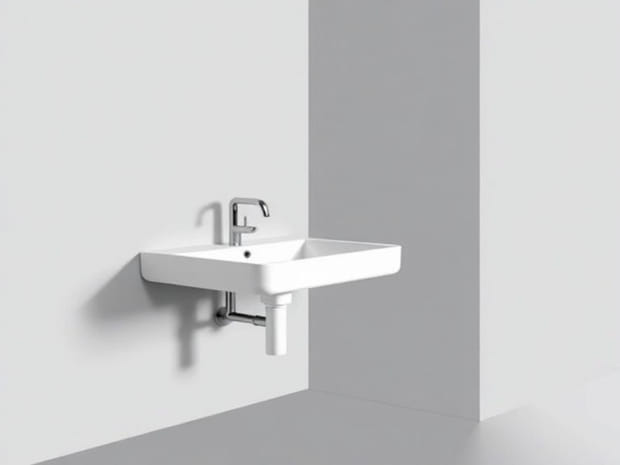
A sink tailpiece extension is a simple yet essential plumbing component. It connects the sink strainer or drain assembly to the P-trap, which is the curved pipe beneath the sink. Sometimes, the standard tailpiece is too short to meet the trap. In such cases, adding an extension piece bridges the gap. These extensions are usually made of plastic (PVC or polypropylene) or metal (chrome-plated brass) and come in various lengths.
Why You Might Need an Extension
Several situations call for a sink tailpiece extension. For example, when you replace a sink or vanity, the drain outlet may not line up with the existing plumbing. Similarly, installing a new P-trap at a different height could leave a gap. Instead of reconfiguring the entire plumbing system, you can simply add an extension to the tailpiece.
- Installing a deeper sink bowl
- Adjusting for new cabinetry
- Aligning with existing P-trap connections
- Fixing misalignment after replacing drain pipes
Tools and Materials Needed
Before beginning the installation, it is helpful to gather all necessary supplies. This will save you from interruptions once you start working under the sink.
- Sink tailpiece extension (plastic or metal)
- Slip joint nuts and washers
- Adjustable wrench or channel-lock pliers
- Hacksaw (if trimming is needed)
- Measuring tape
- Towel or bucket (to catch water)
Steps to Install a Sink Tailpiece Extension
Step 1 Turn Off the Water Supply
While you do not necessarily need to shut off the main water supply for this job, it is wise to ensure the faucet is off and no one uses the sink while you are working. Place a small bucket or towel underneath the drain to catch any remaining water.
Step 2 Measure the Gap
Use a measuring tape to determine the distance between the bottom of the sink’s tailpiece and the top of the P-trap. This measurement helps you select the right size extension or cut it to fit if it is too long.
Step 3 Prepare the Extension
If the extension pipe is longer than needed, mark it with a pencil and carefully cut it to size using a hacksaw. Smooth out any rough edges with sandpaper to ensure a proper seal when installed.
Step 4 Assemble the Fittings
Slide a slip joint nut onto the sink tailpiece, followed by a washer. Insert the extension pipe into place and tighten the slip joint nut by hand. Do the same at the connection between the extension and the P-trap.
Step 5 Tighten the Connections
Once everything is aligned, use an adjustable wrench or channel-lock pliers to snug the slip nuts. Be careful not to overtighten, as this can crack plastic fittings or strip metal threads.
Step 6 Test for Leaks
Run water through the sink and watch carefully for any drips around the new connections. If you notice leaks, loosen the nut, adjust the washer, and retighten until secure. A properly installed sink tailpiece extension should not leak at all.
Tips for a Smooth Installation
Even though this is a relatively simple plumbing fix, paying attention to details will help you avoid problems later.
- Always double-check measurements before cutting the extension pipe.
- Hand-tighten connections first, then give them an extra quarter-turn with a wrench.
- Keep spare washers on hand in case one gets damaged during installation.
- Choose a material that matches your existing plumbing for consistency and durability.
Common Mistakes to Avoid
Some errors can cause leaks or require rework. Avoiding these mistakes will save time and frustration.
- Using the wrong size extension that does not fit your drain system.
- Forgetting to install the washer between the pipe and nut.
- Overtightening fittings, which can cause cracks in plastic pipes.
- Failing to test for leaks before finishing the job.
When to Call a Professional
Most homeowners can easily install a sink tailpiece extension on their own. However, if you find that the pipes do not line up even with an extension, or if you encounter corroded metal parts that will not seal properly, it may be time to call a plumber. A professional can make adjustments or replace sections of piping for a long-term fix.
Maintenance After Installation
After completing the installation, periodic checks are a good idea. Over time, slip nuts can loosen, or washers can wear out. Once in a while, run your hand around the fittings under the sink to feel for moisture. Early detection of small leaks can prevent water damage to cabinets and flooring.
Installing a sink tailpiece extension is a straightforward plumbing task that can be completed with just a few tools and a little patience. It solves alignment issues quickly without requiring major pipe adjustments. By measuring carefully, assembling the parts correctly, and testing for leaks, you can ensure your sink drain works efficiently. Whether you are upgrading a bathroom vanity or adjusting kitchen plumbing, this simple project is a practical solution for homeowners who enjoy tackling do-it-yourself repairs.