Install Ductless Range Hood
Installing a ductless range hood is an effective solution for kitchens where venting to the outside is not feasible. Ductless range hoods, also known as recirculating hoods, filter and purify the air before returning it to the kitchen, removing smoke, odors, and grease. Proper installation ensures efficient performance, safety, and longevity of the appliance. Understanding the steps, tools, and techniques required for a ductless range hood installation allows homeowners and DIY enthusiasts to achieve a professional-quality setup. From preparing the installation site to securing the hood and ensuring electrical connections, careful attention to detail is essential for optimal results.
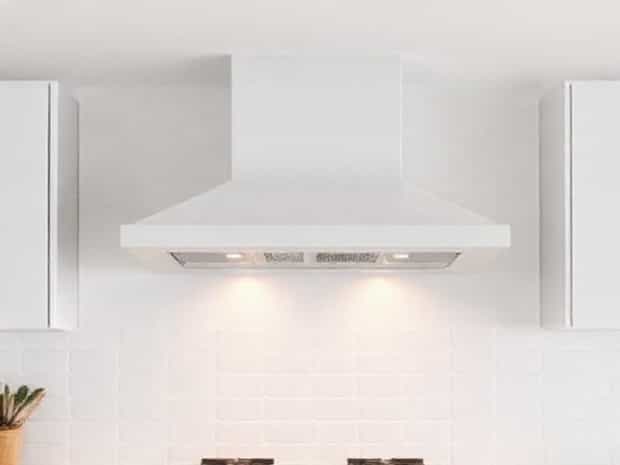
Understanding Ductless Range Hoods
Ductless range hoods differ from traditional vented hoods in that they do not require an external vent to expel air outdoors. Instead, these hoods use built-in filters to trap grease and odors, often incorporating charcoal filters to neutralize smoke and cooking smells. The filtered air is then recirculated back into the kitchen. This design makes ductless range hoods ideal for apartments, condos, or homes without the ability to install ductwork. Additionally, they are generally easier to install and require less maintenance than vented systems, though regular filter cleaning or replacement is necessary for optimal performance.
Benefits of Ductless Range Hoods
- Easy installation without external venting.
- Effective removal of smoke, grease, and odors from the kitchen.
- Suitable for kitchens with limited space or structural constraints.
- Cost-effective compared to traditional vented hoods.
- Energy-efficient, as they do not draw conditioned air outside.
Preparation for Installation
Proper preparation is crucial for a smooth and safe ductless range hood installation. Begin by reviewing the manufacturer’s instructions and measuring the space above the cooking range to ensure the hood fits correctly. Most hoods require a minimum distance from the stovetop, usually between 20 to 30 inches, to provide optimal air capture without interfering with cooking activities.
Tools and Materials Needed
Gathering the necessary tools and materials in advance helps streamline the installation process. Common items include
- Drill and appropriate drill bits
- Screwdrivers
- Measuring tape
- Level
- Pencil or marker for marking positions
- Screws and wall anchors
- Electrical wiring tools if required
- Replacement charcoal filters if not included
Site Preparation
Clear the installation area above the stove, removing any cabinets or obstructions that may interfere with the hood. Ensure the wall or cabinet structure is capable of supporting the weight of the hood, as ductless hoods can vary in size and mass. Mark the positions for screws and mounting brackets using a level to guarantee that the hood will be installed straight and securely.
Step-by-Step Installation Process
Installing a ductless range hood involves several steps, from securing the mounting bracket to connecting electrical power and inserting filters. Following these steps carefully ensures a functional and safe installation.
Step 1 Mount the Bracket
Most ductless range hoods come with a mounting bracket. Position the bracket on the wall or cabinet according to the manufacturer’s instructions and mark the screw holes. Drill pilot holes if necessary and secure the bracket with screws or wall anchors. Ensuring the bracket is level and firmly attached is critical for the stability of the hood.
Step 2 Attach the Range Hood
Lift the ductless range hood and align it with the mounting bracket. Secure the hood to the bracket using screws or locking mechanisms provided by the manufacturer. Depending on the hood’s design, this may require two people to safely hold and install the unit.
Step 3 Electrical Connection
Before connecting the hood to the power supply, ensure the circuit is turned off to prevent electrical shock. Most ductless hoods require a standard 120V outlet connection, though some models may need direct wiring. Follow the manufacturer’s wiring instructions carefully, using proper connectors and securing all wires. If you are not comfortable with electrical work, hiring a licensed electrician is recommended.
Step 4 Insert Filters
Ductless range hoods rely on filters to clean the air. Install the charcoal and grease filters according to the manufacturer’s instructions. Charcoal filters neutralize odors, while metal or mesh filters trap grease. Ensure the filters fit snugly and cover the entire airflow area to maximize efficiency.
Step 5 Test the Hood
Turn on the power and test the range hood at different fan speeds. Check for proper airflow, noise levels, and overall functionality. Verify that lights, if included, are working correctly and that the hood effectively captures smoke and odors from cooking.
Maintenance and Care
Regular maintenance is essential to keep a ductless range hood operating efficiently. Grease and charcoal filters can become clogged over time, reducing airflow and odor removal effectiveness. Cleaning or replacing these filters according to the manufacturer’s schedule ensures optimal performance. Additionally, wipe down the exterior and interior surfaces to remove grease buildup and maintain a clean appearance.
Replacing Filters
- Metal or mesh grease filters should be washed in warm, soapy water or in a dishwasher periodically.
- Charcoal filters typically need replacement every 6 to 12 months, depending on cooking frequency and type.
- Always follow the manufacturer’s guidelines for filter replacement to maintain warranty coverage and efficiency.
Additional Tips
For maximum performance, run the range hood during cooking and for a few minutes afterward to fully remove smoke and odors. Avoid using excessive water or abrasive cleaners on electrical components, and periodically check screws and brackets for tightness to maintain stability.
Common Issues and Troubleshooting
While ductless range hoods are generally easy to install and maintain, users may encounter issues. Common problems include reduced airflow, unusual noise, or ineffective odor removal. These can often be resolved by
- Cleaning or replacing clogged filters.
- Ensuring the hood is securely mounted and level.
- Checking electrical connections for loose or improper wiring.
- Verifying that the fan settings are correctly adjusted.
Installing a ductless range hood is a practical solution for kitchens without external ventilation options. With proper preparation, correct installation techniques, and regular maintenance, a ductless range hood can effectively remove smoke, grease, and odors, enhancing the kitchen environment. From mounting the hood securely to connecting the electrical supply and inserting filters, attention to detail ensures safety and efficiency. Regular care, including filter cleaning and replacement, prolongs the life of the hood and maintains optimal performance. Whether for apartments, condos, or homes with structural limitations, a ductless range hood provides a cost-effective and convenient alternative to traditional vented systems, combining functionality, ease of installation, and low maintenance requirements.
In summary, the process of installing a ductless range hood involves careful planning, proper tools, and adherence to manufacturer guidelines. By following these steps and maintaining the appliance regularly, homeowners can enjoy a cleaner, safer, and more comfortable cooking environment. The simplicity, efficiency, and versatility of ductless range hoods make them a valuable addition to modern kitchens, ensuring effective ventilation without the need for extensive ductwork.