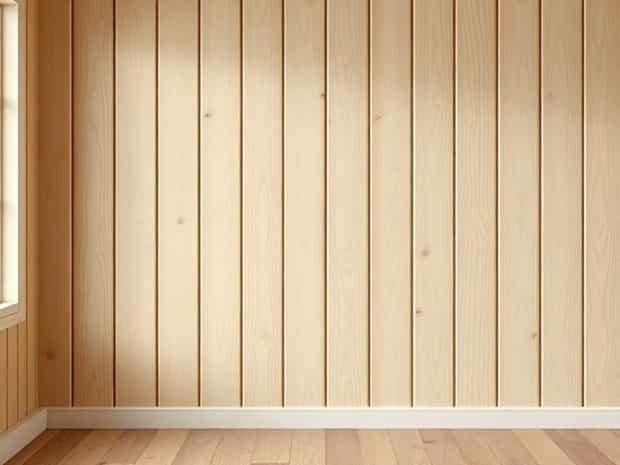
How To Whitewash Varnished Knotty Pine Walls
Whitewashing varnished knotty pine walls can completely transform the look of a room, giving it a bright, airy, and modern farmhouse feel while still preserving the natural wood texture. Varnished pine, especially knotty pine, has a warm, golden hue that can sometimes make a space feel dark or dated. Whitewashing allows light to bounce around the room, softening the wood’s tone without completely covering its natural knots and grain. The process requires careful preparation, the right materials, and patience to achieve a beautiful, long-lasting finish.
Understanding Whitewashing
Whitewashing is a painting technique that applies a diluted white paint or stain to a wood surface to create a translucent, washed-out effect. Unlike solid paint, whitewash allows the natural grain, texture, and knots of the wood to show through, giving the surface depth and character. When working with varnished knotty pine, the challenge lies in ensuring the whitewash adheres properly without peeling or streaking, as varnish creates a slick surface that is not naturally absorbent.
Materials Needed
- Fine-grit sandpaper (120-220 grit)
- White latex paint or water-based stain
- Water for dilution
- Brushes or foam applicators
- Lint-free cloths or rags
- Drop cloths to protect floors
- Painter’s tape
- Clear protective finish (optional)
Preparation of Varnished Knotty Pine Walls
1. Clean the Surface
Begin by thoroughly cleaning the walls. Dust, dirt, and grease can prevent the whitewash from adhering properly. Use a mild detergent and water solution, then rinse and allow the walls to dry completely. Clean walls ensure an even application of the whitewash and a smooth finish.
2. Lightly Sand the Varnish
Since varnished knotty pine has a glossy finish, lightly sanding the surface is crucial. Use fine-grit sandpaper to scuff up the varnish without removing it completely. This creates tiny grooves that help the whitewash adhere. After sanding, wipe the walls with a damp cloth to remove dust. Skipping this step can lead to peeling or uneven whitewashing.
3. Protect Surrounding Areas
Use painter’s tape to protect trim, baseboards, and any adjacent surfaces you do not want to whitewash. Spread drop cloths over floors to catch drips and spills. Taking these precautions keeps your workspace clean and makes the final results look professional.
Mixing and Applying the Whitewash
1. Dilute Your Paint
Mix white latex paint with water to create the whitewash. A typical ratio is one part paint to one part water, but you can adjust depending on how opaque you want the finish. More water creates a lighter wash, allowing more of the wood’s natural color to show through. Stir the mixture thoroughly for a consistent application.
2. Test on a Small Area
Before committing to the entire wall, test the whitewash on a small, inconspicuous area. This allows you to gauge the transparency and adjust the paint-to-water ratio as needed. Testing ensures the final look meets your expectations and prevents surprises on larger surfaces.
3. Apply the Whitewash
Use a brush or foam applicator to apply the whitewash in small sections, following the wood grain. Work from top to bottom to avoid drips and uneven coverage. Apply in thin layers; it’s easier to add more layers than to correct a thick, streaky coat. For knotty pine, use gentle strokes to maintain the texture and highlight the natural knots.
4. Wipe Excess Whitewash
After applying the whitewash, use a lint-free cloth or rag to gently wipe off excess paint. Wiping helps create the translucent, washed-out effect that characterizes whitewashed wood. Experiment with the pressure and timing to control how much of the original wood shows through. More wiping results in a lighter, subtler finish, while less wiping creates a more opaque appearance.
Finishing the Whitewashed Walls
1. Allow to Dry
Let the whitewash dry completely, which usually takes a few hours depending on humidity and ventilation. Avoid touching the surface during drying to prevent smudges or streaks. Patience is key for a smooth, even finish.
2. Add Additional Layers if Needed
If you want a more pronounced whitewashed effect, apply additional thin layers once the previous layer is dry. Each layer can be wiped and adjusted until you achieve the desired look. Layering gives control over transparency and depth, enhancing the wood’s natural beauty.
3. Optional Protective Finish
To protect your newly whitewashed walls from moisture, stains, or wear, consider applying a clear protective finish. A water-based polyurethane or matte sealant works well. Apply in thin, even coats and allow it to dry completely. A protective finish preserves the whitewashed look while adding durability to the varnished pine surface.
Tips and Tricks for Success
- Work in small sections to maintain control over the application and prevent streaks.
- Use soft brushes to avoid scratching the wood and to create smooth strokes.
- Adjust the paint-to-water ratio depending on the level of transparency you prefer.
- Consider using a sponge for subtle, textured effects that enhance the natural grain.
- Always test your whitewash on a hidden area to ensure satisfaction with the final appearance.
- Ventilate the room well during and after the process to speed drying and reduce paint fumes.
Common Mistakes to Avoid
- Skipping sanding, which can cause the whitewash to peel or flake from the varnished surface.
- Applying too thick a layer of whitewash, which results in uneven coverage and streaks.
- Not wiping off excess whitewash promptly, leading to an overly opaque or blotchy appearance.
- Neglecting to protect surrounding areas, causing accidental spills or smears.
- Using oil-based paints, which do not mix well with water and may prevent proper adhesion.
Whitewashing varnished knotty pine walls is a practical and artistic way to refresh the look of your space, blending the charm of natural wood with a modern, lightened aesthetic. By carefully preparing the surface, diluting the paint appropriately, and applying the whitewash in controlled layers, you can achieve a translucent, professional-looking finish. Attention to detail, patience, and practice are key to enhancing the wood’s natural beauty while creating a brighter, more inviting environment. Whether your goal is a subtle wash or a bold transformation, this technique allows you to customize your knotty pine walls to suit your style and interior design preferences.