How To Lattice Pie Crust
Creating a lattice pie crust is a classic baking technique that not only adds a beautiful visual appeal to pies but also allows steam to escape while baking, ensuring a perfectly cooked filling. The delicate weave of pastry strips can elevate a simple fruit pie into an impressive centerpiece for any dessert table. While the process may seem intimidating at first, mastering the art of lattice pie crust is achievable with patience, proper preparation, and some helpful tips. This topic provides a step-by-step guide on how to lattice a pie crust, along with practical advice to achieve a professional-looking finish.
Preparing Your Pie Dough
The foundation of a successful lattice pie crust begins with well-prepared dough. A tender, flaky crust is essential, and it requires the right balance of ingredients and proper handling. To prepare the dough
- Use cold butter or shortening to create a flaky texture. Cut it into small pieces before mixing it with flour.
- Incorporate a small amount of water gradually until the dough comes together. Avoid overworking it to prevent toughness.
- Divide the dough into two portions one for the bottom crust and one for the lattice top.
- Chill both portions in the refrigerator for at least 30 minutes before rolling out to make them easier to handle.
Properly chilled dough helps prevent sticking and makes the process of cutting and weaving strips more manageable.
Rolling Out the Dough
Once the dough is chilled, it is time to roll it out. Start by lightly flouring your work surface and rolling pin
- Roll the bottom crust to fit your pie pan, ensuring it is slightly larger than the pan to allow for trimming.
- Carefully transfer the bottom crust into the pan and gently press it into place, making sure there are no air bubbles.
- Roll out the second portion of dough to a similar thickness for cutting into strips. Aim for uniform width strips, typically between ½ to ¾ inch.
Uniform strips make it easier to weave the lattice and create a consistent appearance across the top of the pie.
Cutting the Strips
Cutting even strips is crucial for a neat lattice design. Use a sharp knife, pizza cutter, or pastry wheel to cut straight lines. Consistency in width ensures the lattice looks professional and bakes evenly. Once cut, lightly flour the strips to prevent sticking while weaving.
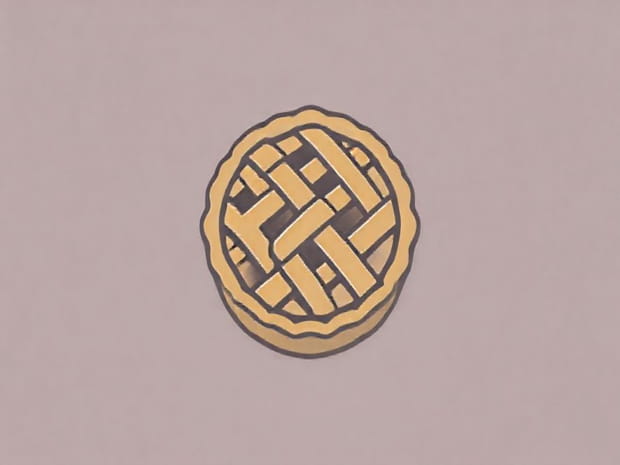
Creating the Lattice Pattern
The weaving process is the key step in forming a lattice crust. Follow these steps for a classic over-and-under pattern
- Lay half of the strips vertically across the pie, spacing them evenly.
- Fold back every other vertical strip halfway and place a horizontal strip across the center.
- Unfold the vertical strips over the horizontal strip.
- Repeat this process, alternating folds, until the lattice covers the entire pie.
The over-and-under technique produces the traditional woven look, while careful spacing ensures an even bake and allows steam to escape efficiently from the filling.
Trimming and Sealing the Edges
After completing the lattice weave, trim the excess dough from the edges using a knife or kitchen scissors. Press the edges gently to seal them with the bottom crust. You can create a decorative edge by crimping with your fingers or a fork. This step not only improves the pie’s appearance but also prevents the edges from shrinking during baking.
Finishing Touches
Adding a finishing touch enhances both the look and flavor of your lattice pie
- Brush the lattice with an egg wash made from beaten egg and a little water. This will give the crust a shiny, golden-brown finish.
- Sprinkle sugar lightly over the top if desired, adding a touch of sweetness and texture.
- Ensure that the pie filling is evenly distributed before baking to prevent spilling and maintain the lattice shape.
Baking the Pie
Bake the pie according to the recipe instructions, typically at 375-400°F (190-200°C) for 40-50 minutes, until the crust is golden brown and the filling is bubbling. During baking, check occasionally to prevent over-browning. If the edges brown too quickly, cover them with foil to protect them while the rest of the pie finishes baking.
Tips for a Successful Lattice Pie Crust
Even experienced bakers benefit from practical tips that make lattice construction easier and more precise
- Keep the dough cold throughout the process; warm dough is more prone to tearing and sticking.
- Use a ruler or guide for cutting strips if you want perfectly uniform widths.
- Weave carefully without stretching the dough too much, as this can distort the lattice pattern during baking.
- Practice on a smaller piece of dough if you are new to lattice work to build confidence and skill.
Common Mistakes to Avoid
Understanding common errors can save time and improve results
- Cutting uneven strips that cause the lattice to look sloppy.
- Overhandling the dough, which can make it tough.
- Failing to seal the edges properly, leading to filling leakage.
- Not using an egg wash, which can result in a dull-looking crust.
Variations and Creativity
While the traditional over-and-under lattice is classic, you can experiment with variations
- Diagonal LatticeLay strips diagonally across the pie for a different visual effect.
- Double WeaveUse thinner strips to create an intricate woven pattern.
- Decorative CutoutsIncorporate small cutouts from extra dough into the lattice for added flair.
These variations allow you to customize your pies for special occasions or personal preference while maintaining the functional benefits of a lattice crust.
Mastering the art of lattice pie crust requires patience, attention to detail, and practice. From preparing the dough and cutting uniform strips to weaving and finishing the edges, each step contributes to a visually appealing and delicious pie. By following the steps outlined in this guide, bakers of all levels can create lattice pies that not only showcase creativity but also ensure even baking and proper venting of the filling. With the right technique and a few helpful tips, achieving a perfectly woven lattice pie crust is both enjoyable and rewarding, elevating any pie to a professional-quality dessert.