How To Draw A Tsetse Fly
Drawing unusual creatures can be both challenging and exciting, especially when it involves insects that are less familiar to the general public. The tsetse fly, native to parts of Africa, is not only biologically significant but also visually distinctive. Its long proboscis, transparent wings, and slender body make it an intriguing subject for artists, students, and hobbyists learning how to capture details in nature drawing. Learning how to draw a tsetse fly step by step is a rewarding way to improve observation skills, enhance patience, and develop an eye for fine details that often go unnoticed.
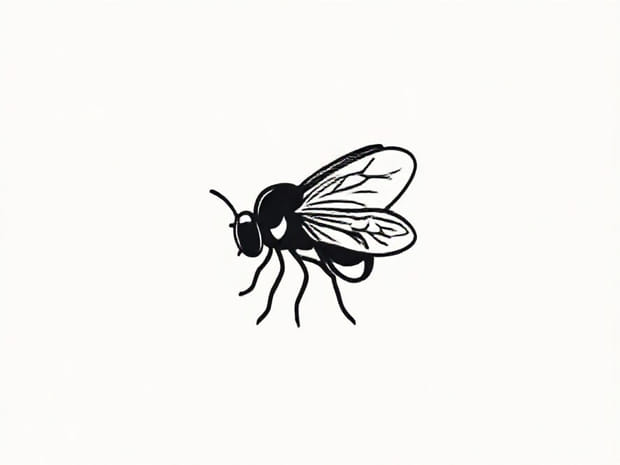
Understanding the Features of a Tsetse Fly
Before starting the drawing, it is important to observe what makes the tsetse fly unique. Unlike common houseflies, this insect has a more elongated body and a piercing mouthpart used for feeding on blood. Its wings overlap neatly when at rest, creating a distinct characteristic that artists should note. Paying attention to these details allows the final sketch to appear more realistic and accurate.
Key characteristics to observe
- Slender body with noticeable segmentation
- Prominent proboscis extending from the head
- Clear wings that fold one over the other
- Large, rounded compound eyes
- Short antennae near the front of the head
Gathering the Right Drawing Materials
While drawing a tsetse fly does not require professional equipment, having the right tools can make the process smoother. A sketchbook with medium-textured paper works well for capturing both outlines and fine details. Pencils of varying hardness allow you to create depth, while erasers help refine mistakes. For a more polished look, fine-tip pens can be used for inking.
Suggested materials
- HB pencil for initial outlines
- 2B or 4B pencils for shading darker areas
- Kneaded eraser for corrections and highlights
- Fine liner pens for clean outlines
- Optional colored pencils for a realistic finish
Step-by-Step Guide on How to Draw a Tsetse Fly
Step 1 Sketch the Basic Outline
Begin with a light pencil sketch. Draw a small oval for the head, a larger oval for the thorax, and a long narrow shape for the abdomen. These shapes will act as a guide for the body structure. Keep the lines light so adjustments can be made easily.
Step 2 Add the Head Details
On the head, draw two large compound eyes that nearly cover the sides. Between them, sketch short antennae. Extend a narrow line downward from the front of the head to form the proboscis, which should be noticeably longer than in common flies. This feature is crucial for distinguishing the tsetse fly.
Step 3 Define the Thorax and Wings
Using the thorax oval as a guide, draw the attachment points for the wings. The wings should be long, slightly pointed at the tips, and transparent. Overlap them to reflect the way tsetse flies rest with their wings folded neatly on top of each other.
Step 4 Shape the Abdomen
The abdomen is elongated with visible segment lines. Divide the abdomen into sections with soft, curved lines to give it a natural insect-like appearance. Each segment can be slightly narrower than the one before it, tapering toward the end.
Step 5 Draw the Legs
From the thorax, extend six thin legs. Each leg should have multiple segments, with the last section ending in tiny claws. Position the legs in different angles to create a more dynamic and lifelike stance.
Step 6 Refine the Details
Erase unnecessary guidelines and begin refining the main features. Add small textures on the abdomen, veins on the wings, and subtle shading around the thorax to give the drawing dimension. The proboscis can be darkened slightly to highlight its prominence.
Step 7 Add Shading and Final Touches
With a softer pencil, shade the darker areas such as the eyes, wing overlaps, and underside of the body. Apply lighter shading to suggest transparency in the wings. Use a kneaded eraser to lift highlights and give the insect a more realistic appearance.
Tips for Drawing a Realistic Tsetse Fly
- Study reference images to better understand proportions and angles.
- Use light strokes in the beginning to avoid heavy erasing later.
- Experiment with different pencil pressures to create depth and texture.
- Practice drawing smaller details like the segmented legs separately before adding them to the main sketch.
- Don’t rush precision is more important than speed when working with detailed subjects.
Exploring Artistic Styles
While a scientific drawing requires accuracy, an artistic interpretation can give more freedom. Some artists may choose to exaggerate the large eyes or the long proboscis for dramatic effect. Others may incorporate colors to emphasize the insect’s natural tones, often muted browns and grays. Both approaches allow for creativity while still recognizing the unique characteristics of the tsetse fly.
Why Drawing a Tsetse Fly Is Beneficial
Beyond improving technical drawing skills, sketching a tsetse fly can also help in understanding biology and appreciating the complexity of insect anatomy. Students studying entomology may find this exercise useful, while artists gain practice in depicting symmetry, transparency, and texture. Drawing such an insect also encourages careful observation, a skill that translates into all forms of art.
Learning how to draw a tsetse fly provides both a creative and educational experience. By breaking down the process into steps starting from basic outlines and progressing to refined details you can capture the insect’s distinctive appearance. Whether your goal is a realistic sketch or a more stylized artwork, the practice will enhance your drawing abilities and deepen your appreciation for the beauty of nature’s smallest creatures.