How To Draw A Gargoyle
Drawing a gargoyle can be a thrilling and creative experience for artists of all skill levels. These mythical stone creatures, often seen perched on the edges of Gothic cathedrals, inspire a sense of mystery, horror, and fantasy. Unlike drawing ordinary animals or humans, gargoyles allow for imaginative freedom in combining elements like wings, claws, horns, and menacing facial expressions. By understanding the structure, features, and techniques involved, anyone can create a gargoyle illustration that feels both realistic and fantastical. The process also enhances artistic skills in anatomy, shading, and perspective, making it a rewarding exercise for any creative mind.
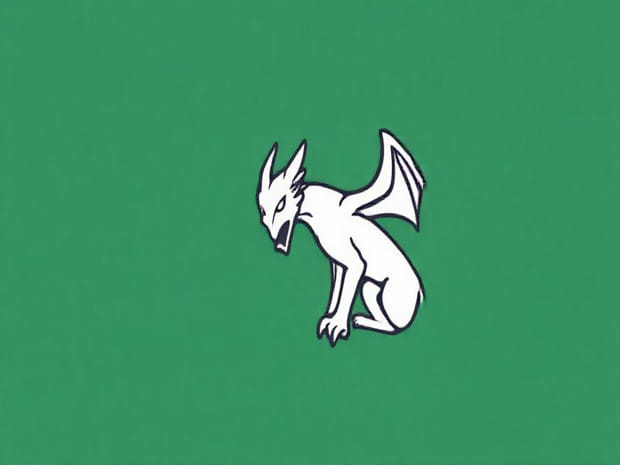
Understanding the Anatomy of a Gargoyle
Before starting to draw a gargoyle, it is important to understand its anatomy and design elements. Gargoyles are traditionally depicted as grotesque creatures with exaggerated features. They often have muscular bodies, clawed hands and feet, wings, and sharp teeth. Some designs resemble humans, while others are more animalistic or demonic. Studying different gargoyle sculptures, whether from photographs of Gothic architecture or fantasy art, can provide valuable references. Observing how stone gargoyles are carved helps artists understand proportions, poses, and structural balance.
Basic Shapes and Structure
Most gargoyle drawings begin with simple shapes to establish the pose and proportions. Circles, ovals, and rectangles can represent the head, torso, limbs, and wings. For example, a large oval might form the chest, while smaller circles mark the joints. Using light pencil strokes to sketch these basic shapes ensures flexibility, allowing adjustments before adding details. This foundational step is critical because it defines the overall structure and helps maintain symmetry and dynamic poses.
Step-by-Step Guide to Drawing a Gargoyle
Step 1 Sketching the Pose
Start by deciding on the pose of your gargoyle. Will it be crouched, perched on a ledge, or flying? Use basic shapes to outline the torso, head, limbs, and wings. Pay attention to the center of gravity; a crouching gargoyle often has bent knees and a forward-leaning posture. This first sketch should be loose, focusing on movement and balance rather than details.
Step 2 Defining the Head and Facial Features
The face is the most expressive part of a gargoyle. Begin by shaping the skull and jawline, adding exaggerated features such as pointed ears, fangs, or a pronounced brow. Consider giving it a snarling or menacing expression, which can add character. Eyes are often deep-set, and noses can be flat or hooked. Experimenting with different expressions can make each gargoyle unique and more lifelike.
Step 3 Outlining Limbs and Claws
Next, outline the arms, legs, and hands, keeping in mind muscular structure and articulation. Gargoyles often have elongated fingers with sharp claws, which can enhance their intimidating appearance. Pay attention to joints and how limbs bend naturally, even if you exaggerate their size for a more dramatic effect. Legs may be digitigrade, like a cat or bat, adding to the creature’s supernatural quality.
Step 4 Designing Wings and Tail
Wings are optional but common in gargoyle designs. Bat-like wings are most traditional, with a strong membrane stretching between finger-like bones. Start by sketching the wing’s arm structure, then add the membrane in flowing lines. A tail, horns, or other appendages can also enhance the design. Ensure that these elements follow the perspective of the pose to create a cohesive, believable figure.
Adding Details and Texture
Step 5 Detailing the Face and Body
After the basic structure is in place, start adding details. Wrinkles, scales, and veins can give the gargoyle a realistic stone-like texture. For the face, add fine lines around the eyes, mouth, and forehead to create depth. Muscles and sinews on the body can be highlighted with subtle shading, enhancing the three-dimensional effect. This stage is where the gargoyle begins to take on a more lifelike and menacing appearance.
Step 6 Shading and Lighting
Shading is critical in giving your gargoyle volume and depth. Decide on a light source and apply darker tones in areas that are shadowed, such as under the jaw, beneath the wings, and behind limbs. Lighter areas should indicate where light strikes the creature. Cross-hatching, stippling, or smooth gradient shading can all be effective depending on the desired style. Proper shading makes the gargoyle appear solid, as if carved from stone.
Refining and Finalizing the Drawing
Step 7 Cleaning Up Lines
Once details and shading are added, clean up unnecessary sketch lines. Darken the main outlines to make the figure stand out. Use erasers selectively to enhance highlights and remove any stray marks. This final refinement ensures clarity and focus in your drawing, making the gargoyle visually striking.
Step 8 Adding Background and Environment
While optional, a background can place your gargoyle in context, such as on a cathedral ledge, a cliff, or a fantasy city. Even simple architectural elements, clouds, or shadows can enhance the mood and make the drawing more dynamic. Consider perspective and scale when adding environmental elements to maintain coherence.
Tips for Improving Your Gargoyle Drawings
- Study existing gargoyle sculptures and fantasy art for inspiration and anatomical references.
- Experiment with exaggerated features to create unique and memorable designs.
- Practice different poses to improve dynamic movement and balance.
- Use a combination of line work and shading to achieve texture and depth.
- Take breaks and review your drawing from a distance to check proportions and impact.
Drawing a gargoyle is a rewarding artistic endeavor that combines imagination, anatomy, and technical skill. By starting with basic shapes, refining the structure, adding facial features, limbs, wings, and textures, and finishing with shading and environmental context, anyone can create a compelling and lifelike gargoyle illustration. The process encourages creativity while teaching important skills in observation, proportion, and three-dimensional rendering. Whether for a fantasy project, art practice, or personal enjoyment, learning how to draw a gargoyle opens up endless possibilities for storytelling and artistic expression.
Through patience and practice, even novice artists can achieve striking results, while experienced artists can push boundaries with complex designs and dramatic poses. Embracing both the traditional and imaginative aspects of gargoyles allows each drawing to capture the eerie and majestic qualities that have fascinated people for centuries.