How To Draw A Cornstalk
Drawing a cornstalk can be a fun and rewarding experience for artists of all skill levels. Cornstalks are iconic symbols of agriculture and rural landscapes, and capturing their structure and texture can add depth and realism to your artwork. While it may seem complex at first, understanding the anatomy of a cornstalk and practicing basic techniques can make the process approachable and enjoyable. This guide will take you step by step through drawing a cornstalk, including its stem, leaves, tassels, and ears, offering tips for creating a realistic and visually appealing result.
Understanding the Structure of a Cornstalk
Before putting pencil to paper, it’s essential to understand the basic structure of a cornstalk. A typical cornstalk consists of a central stem, elongated leaves, and the ear, which holds the kernels. At the top, the tassel releases pollen, while the silks emerging from the ear are part of the fertilization process. Observing real cornstalks or reference photos can help you capture accurate proportions and details.
The stem is generally tall and segmented, with nodes from which the leaves sprout. Leaves are long and narrow with pointed tips and a slightly curved shape. The ear is often attached midway along the stalk, partially hidden by leaf sheaths, and the tassel consists of numerous small, delicate strands extending outward.
Materials Needed
Gathering the right materials can make drawing a cornstalk easier and more enjoyable. You will need
- Pencils of various hardness (e.g., HB, 2B, 4B)
- An eraser for corrections and highlights
- Paper suitable for sketching or drawing
- A ruler for measuring proportions if needed
- Optional colored pencils or watercolors for adding color
Having a range of pencils allows you to create light guidelines and darker lines for details, while an eraser helps refine shapes and add texture.
Step-by-Step Guide to Drawing a Cornstalk
Step 1 Draw the Basic Outline
Start by lightly sketching the central stem of the cornstalk. Draw a vertical line to indicate its height and lightly mark the positions of nodes along the stem. These nodes will serve as the points where leaves and ears attach. Keep your lines light so you can adjust proportions as needed.
Step 2 Add the Leaves
Next, draw the leaves extending from the nodes. Corn leaves are long, narrow, and slightly curved. Begin at the node and sweep outward and downward, tapering the ends to a point. Leaves closer to the top of the stalk are usually shorter and thinner, while those near the middle and bottom are longer and wider. Adding slight waves or curves gives the leaves a more natural and dynamic appearance.
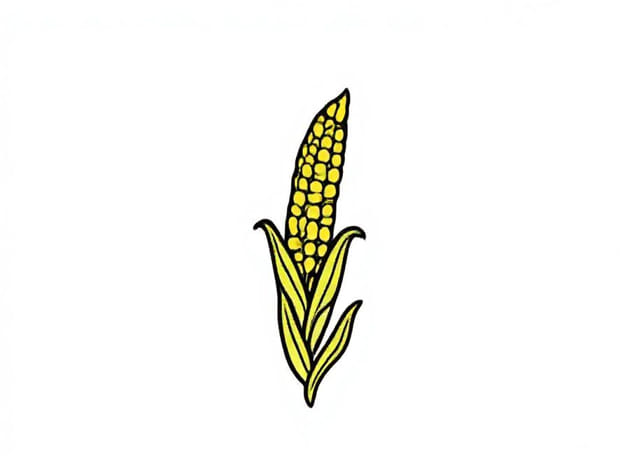
Step 3 Draw the Ear of Corn
The ear of corn is attached to the stalk and partially covered by leaves. Draw an oval or slightly elongated shape at the node where the ear is located. Add the husk by sketching layers around the ear, showing the natural folds and overlapping leaves. Make sure to maintain correct proportions so that the ear does not appear too large or small compared to the stalk.
Step 4 Add the Tassel
At the top of the cornstalk, draw the tassel. The tassel consists of many fine, thread-like strands that spread outward and slightly droop. Use light, gentle strokes to represent the delicate strands, adding a sense of movement and texture. This part can be challenging, but careful observation of reference images helps capture its intricate details.
Step 5 Include the Silks
Emerging from the top of the ear, the silks are long, thin threads that play a role in fertilization. Draw them cascading from the ear with light, flowing lines. Silks may cross over the husk and leaves, so overlapping lines can create a realistic effect. Keep the lines delicate to contrast with the sturdier stalk and leaves.
Adding Details and Texture
Once the basic shapes are in place, begin adding details to enhance realism. For the stem, draw vertical lines to indicate the segmented structure. Add fine lines on the leaves to show veins, which run parallel from base to tip. For the husks and tassel, vary the line thickness to suggest depth and dimension. Light shading can indicate curvature and volume, bringing the cornstalk to life on the page.
- Stem Add light vertical lines and shading for texture
- Leaves Draw parallel veins and gentle curves
- Husk Show overlapping layers with subtle shading
- Tassel and silks Use thin, flowing lines for delicacy
Tips for Realistic Drawing
Creating a realistic cornstalk requires patience and careful observation. Some tips include
- Use reference photos or live plants to understand proportions and details
- Start with light sketch lines and gradually build up darker lines
- Observe the direction of leaves and tassels to capture natural movement
- Pay attention to overlapping elements for a three-dimensional effect
- Practice shading techniques to give depth to the stalk and leaves
Experimenting with different angles and perspectives can also add interest and variety to your drawings, making each cornstalk unique.
Coloring the Cornstalk
After finishing the pencil drawing, you can add color to enhance realism. Green shades work well for the leaves and stalk, while yellow or golden tones suit the ear. Tassels and silks can be drawn in light yellow or beige, maintaining delicate detail. Using colored pencils, watercolors, or markers can add depth and vibrancy to your artwork, highlighting the natural beauty of a cornstalk.
Practice and Patience
Drawing a cornstalk may seem challenging at first, but practice and careful observation improve skills over time. By breaking the process into steps drawing the stem, leaves, ear, tassel, and silks you can create a structured approach that simplifies complex details. Each attempt helps refine proportions, line quality, and shading techniques. With patience and dedication, you can create a cornstalk drawing that is both realistic and artistically expressive.
Learning how to draw a cornstalk involves understanding its structure, observing details, and practicing step-by-step techniques. From sketching the central stem and leaves to adding the ear, tassel, and silks, every part of the cornstalk contributes to a lifelike representation. Attention to texture, shading, and line quality enhances realism, while optional coloring brings the drawing to life. With consistent practice, anyone can develop the skill to capture the beauty of a cornstalk in their artwork, making it a rewarding addition to their artistic repertoire.