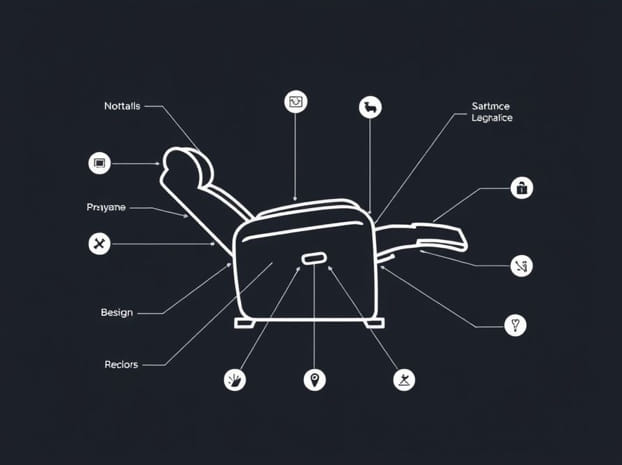
Homestretch Recliner Parts Diagram
When it comes to comfort and relaxation at home, a recliner is often the first piece of furniture people think about. Among the many brands available, Homestretch recliners are well known for their durability, functionality, and smooth reclining motion. Like any mechanical furniture, however, these recliners are made up of multiple components that work together to provide the comfort users expect. Understanding the Homestretch recliner parts diagram can help owners maintain their chairs, identify replacement parts, and even troubleshoot small issues without the need for professional repair. A clear knowledge of these parts is especially useful for those who want to extend the life of their furniture while keeping it in top condition.
Overview of Homestretch Recliner Parts
A Homestretch recliner combines upholstery, mechanics, and electronics in some models to deliver its functionality. Each part has a unique role, from the frame that supports the chair’s weight to the reclining mechanism that allows smooth motion. By studying a recliner parts diagram, you can better understand how these pieces fit together, making it easier to maintain or repair the recliner over time.
Main Structural Components
The structure of a recliner is built to provide both stability and comfort. These parts form the foundation of the chair and are designed to handle everyday use without losing strength or comfort.
-
Frame– Usually made of wood or metal, the frame is the skeleton of the recliner. It holds everything together and provides durability.
-
Springs– Located beneath the seat, springs provide resilience and comfort by absorbing weight and pressure.
-
Padding and Upholstery– Cushions, foam, and fabric or leather cover the frame, giving the recliner its plush, inviting appearance.
Reclining Mechanism
At the heart of the Homestretch recliner parts diagram is the reclining mechanism. This is what transforms the chair from an upright sitting position into a laid-back reclined posture. The mechanism can be manual or powered, depending on the model.
-
Lever or Handle– On manual recliners, the lever releases the reclining mechanism, allowing the footrest to extend and the backrest to tilt.
-
Metal Arms and Hinges– These interconnected parts move the chair smoothly between positions. They must be sturdy and well-aligned.
-
Footrest Assembly– This includes the extendable leg rest, which provides comfort when the chair is reclined. It is supported by a scissor-like mechanism beneath.
Motorized Components
In Homestretch power recliners, additional parts are included to control reclining at the touch of a button. These components add convenience but also require occasional maintenance.
-
Motor– The electric motor powers the recline and footrest movement. Depending on the model, there may be separate motors for different sections of the chair.
-
Remote Control or Buttons– Usually located on the side panel, these allow users to adjust the position with ease.
-
Power Supply and Cables– Electrical wiring connects the motor to the control panel and power source. These parts need to be checked if the recliner stops functioning properly.
Understanding a Homestretch Recliner Parts Diagram
Looking at a recliner parts diagram may feel overwhelming at first, but breaking it down section by section makes it easier to understand. Most diagrams highlight the connection between the frame, seat, footrest, and reclining mechanism. By studying these diagrams, you can visually trace how each part interacts with another, which is especially helpful if you are replacing or repairing specific components.
Sections of the Diagram
A typical Homestretch recliner diagram is divided into several sections. These include
-
Base and Frame– Shown as the bottom support, including wood or metal beams and fasteners.
-
Seat Support– Springs, padding, and brackets are usually labeled here.
-
Reclining Mechanism– This section shows the interconnected arms, scissor links, and pivot points that enable movement.
-
Backrest and Cushioning– Illustrated separately, this part includes foam, fabric, and brackets connecting to the frame.
-
Motorized Parts (if applicable)– Diagrams of power recliners highlight the motor placement, wiring, and control switch locations.
Common Issues with Recliner Parts
Even with durable construction, recliners experience wear and tear over time. Understanding the parts diagram helps in identifying problem areas quickly. Some of the most common issues include
Loose or Broken Springs
Springs can lose tension or break after years of use, causing the seat to sag. By locating the spring section in the parts diagram, you can determine the correct replacement type.
Handle or Lever Malfunctions
If the recliner no longer opens smoothly, the handle or internal release mechanism may be the issue. A diagram helps pinpoint the exact location of the faulty part, making replacement easier.
Footrest Problems
A common issue is a footrest that will not stay up or extend properly. This usually relates to the scissor mechanism or the connecting arms in the diagram. Adjustments or replacements can restore smooth operation.
Power Recliner Failures
For motorized models, electrical failures may occur in the motor, wiring, or control panel. The diagram highlights how these parts connect, allowing for easier troubleshooting and part replacement.
Replacing Homestretch Recliner Parts
Once you identify a faulty part using the diagram, replacing it is often straightforward. Homestretch recliner parts are generally available through furniture retailers or repair suppliers. Having the correct part number from the diagram ensures compatibility.
Steps for Replacement
-
Identify the faulty part– Use the diagram to match the part with its label and number.
-
Order replacement– Make sure to purchase the exact match to ensure proper fitting.
-
Disassemble carefully– Remove screws or bolts that hold the part in place, keeping track of small pieces.
-
Install new part– Follow the diagram to align and attach the new component securely.
-
Test functionality– After replacement, check that the recliner operates smoothly before full use.
Maintaining Your Homestretch Recliner
Prevention is always better than repair, and regular maintenance can extend the life of your recliner. Using the recliner parts diagram as a guide, you can develop a maintenance routine to keep your chair in top shape.
Maintenance Tips
-
Lubricate moving parts– Apply lubricant to the metal arms and joints to keep them operating smoothly.
-
Tighten screws and bolts– Regularly check for loose fasteners that can affect stability.
-
Clean upholstery– Use appropriate cleaners for fabric or leather to keep the chair looking fresh.
-
Check electrical components– Inspect power cords and switches periodically for signs of wear or damage.
A Homestretch recliner is built for long-lasting comfort, but like any piece of furniture with moving parts, it requires care and occasional part replacements. Understanding the Homestretch recliner parts diagram provides valuable insight into how the chair functions and how each part contributes to its comfort. With this knowledge, homeowners can troubleshoot issues, order the correct replacement parts, and even perform minor repairs themselves. By maintaining and caring for your recliner, you ensure that it continues to deliver relaxation and support for years to come.
Whether you own a manual or power model, taking time to familiarize yourself with the diagram can save money, extend the chair’s lifespan, and give you confidence in handling small repairs. A Homestretch recliner is an investment in comfort, and with the right understanding of its parts, you can enjoy that investment for many years.