How To Plant Gladiolus Bulbs
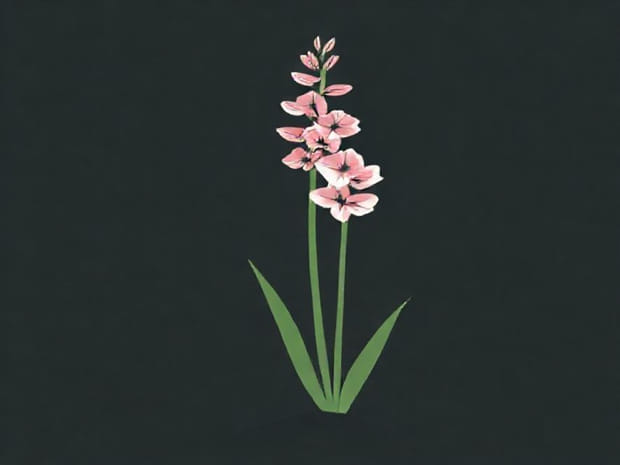
Gladiolus flowers are known for their tall, striking spikes of blooms that bring vibrant color and elegance to any garden. Planting gladiolus bulbs is a straightforward process, but it requires attention to timing, soil preparation, and proper care to ensure healthy growth and abundant flowering. These bulbs are versatile, suitable for borders, beds, and cut flower arrangements, making them a favorite among gardeners. Understanding how to plant gladiolus bulbs correctly allows you to enjoy their stunning blooms throughout the growing season. This guide will cover everything from selecting healthy bulbs to planting, watering, and caring for gladiolus plants, providing practical tips for beginners and experienced gardeners alike.
Choosing the Right Gladiolus Bulbs
Selecting healthy gladiolus bulbs is the first step toward a successful planting. Look for firm, plump corms without any signs of mold, rot, or damage. Larger corms generally produce taller plants with more flower spikes, while smaller corms may bloom later or yield fewer flowers. Some bulbs are pre-sprouted or treated for disease resistance, which can be an advantage in achieving faster growth and healthier plants.
Types of Gladiolus Bulbs
- Large-flowered hybrids Ideal for dramatic garden displays and cutting for bouquets.
- Dwarf varieties Perfect for container planting or borders.
- Miniature gladiolus Suitable for rock gardens or small spaces.
Preparing the Planting Site
Gladiolus bulbs thrive in well-draining soil with plenty of organic matter. Choose a location that receives full sunlight for at least six hours a day, as adequate sunlight is crucial for strong stems and vibrant blooms. Avoid areas prone to waterlogging, which can cause bulb rot and fungal diseases. Preparing the soil in advance ensures that the bulbs have the nutrients and structure needed for optimal growth.
Soil Preparation
- Loosen the soil to a depth of 12 to 15 inches.
- Incorporate compost or well-rotted manure to enrich the soil.
- Mix in sand if the soil is heavy clay to improve drainage.
- Check the pH level; gladiolus prefer slightly acidic to neutral soil (pH 6.0-7.0).
Planting Gladiolus Bulbs
The timing of planting gladiolus bulbs depends on your local climate. In most temperate regions, planting occurs in spring after the last frost. In warmer climates, bulbs can be planted in fall or winter for early blooms. Proper spacing and planting depth are crucial to prevent overcrowding and ensure strong, upright growth.
Step-by-Step Planting Guide
- Dig holes about 4 to 6 inches deep, depending on the size of the bulb.
- Space bulbs 6 to 8 inches apart to allow room for growth and airflow.
- Place the bulb in the hole with the pointed end facing up.
- Cover with soil and gently firm it to remove air pockets.
- Water thoroughly after planting to help settle the soil and start root growth.
Watering and Fertilizing Gladiolus
After planting, gladiolus bulbs require consistent moisture to establish roots. Avoid overwatering, which can lead to rot, and ensure the soil remains evenly moist. Fertilizing at the right time supports healthy foliage and flower production. Use a balanced, water-soluble fertilizer or a slow-release granular fertilizer according to the manufacturer’s instructions.
Watering Tips
- Water deeply once or twice a week, depending on rainfall and soil type.
- Reduce watering once flowers begin to fade to encourage bulb dormancy.
Fertilization Schedule
- Apply a high-phosphorus fertilizer at planting to encourage root development.
- Feed every 2-3 weeks during the growing season for strong stems and blooms.
- Avoid high-nitrogen fertilizers, which promote leaf growth over flowers.
Supporting Gladiolus Stems
Gladiolus flowers grow tall and can become top-heavy, especially during windy conditions. Staking the stems ensures that they remain upright and prevents damage. Use bamboo stakes or plant supports inserted near the bulbs and loosely tie the stems with soft garden twine.
Managing Pests and Diseases
Gladiolus bulbs are generally hardy but can be affected by pests like thrips, aphids, and fungal diseases. Regular inspection and preventive measures help maintain healthy plants. Remove dead foliage and spent flowers to reduce the risk of disease. If necessary, use appropriate insecticides or fungicides, following safety guidelines and manufacturer recommendations.
Harvesting and Storing Bulbs
Gladiolus flowers can be cut for arrangements when the lower florets start to open. Cutting early allows the upper buds to bloom over time. After the growing season, gladiolus bulbs should be dug up in regions with cold winters. Clean the bulbs, remove any diseased or damaged parts, and store them in a cool, dry place until the next planting season. Proper storage ensures the bulbs remain viable and healthy for future use.
Additional Tips for Success
- Plant in succession every 2-3 weeks for continuous blooms throughout the season.
- Choose disease-resistant varieties to reduce maintenance.
- Mulch around the base of plants to conserve moisture and regulate soil temperature.
- Rotate planting locations each year to prevent soil-borne diseases.
Planting gladiolus bulbs is a rewarding gardening activity that yields beautiful, vibrant flowers. By selecting healthy bulbs, preparing the soil carefully, planting at the right depth and spacing, and providing consistent care, gardeners can enjoy a long-lasting display of blooms. Proper watering, fertilization, staking, and pest management further enhance plant health and flower production. Whether used in borders, beds, or as cut flowers, gladiolus add elegance and color to any garden, making them a valuable addition to any planting plan. With attention to detail and consistent care, anyone can successfully grow gladiolus bulbs and enjoy their spectacular floral display year after year.