How To Clean Knotty Pine Walls
Knotty pine walls have a unique charm, adding warmth and character to any interior space. However, their textured surface and prominent knots can accumulate dust, grime, and even stains over time, making them challenging to clean effectively. Maintaining the beauty of knotty pine requires proper techniques and the right cleaning materials. Whether your walls are in a living room, hallway, or cabin, regular cleaning will preserve their natural luster and prevent long-term damage. Understanding how to clean knotty pine walls correctly ensures they remain a focal point of your home for years to come.
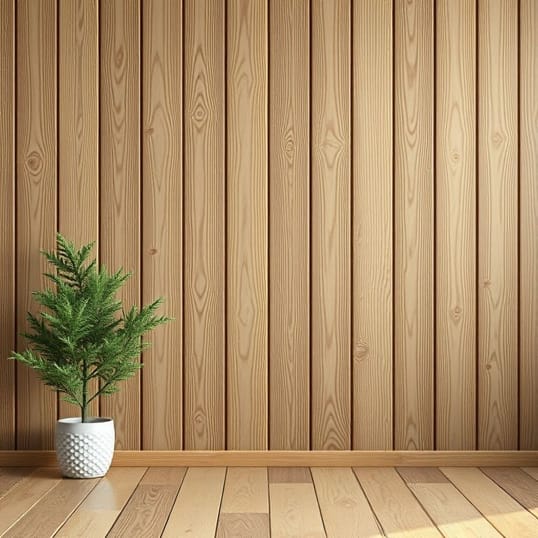
Understanding Knotty Pine
Knotty pine is a type of softwood that features natural knots and distinct grain patterns. These characteristics give the wood its rustic appeal but also create small crevices where dirt and dust can accumulate. Unlike smooth painted walls, knotty pine requires gentle cleaning methods to avoid damaging the wood while still removing grime effectively. Knowing the type of finish on your knotty pine walls whether varnished, stained, or untreated is essential before beginning any cleaning process.
Identifying the Finish
Before cleaning, determine if your knotty pine walls are finished with varnish, polyurethane, or just bare wood. A simple test involves placing a few drops of water on a small, inconspicuous area. If the water beads up, the wood is sealed, meaning you can use mild cleaning solutions. If the water is absorbed, the wood is untreated, and you should avoid excess moisture to prevent warping or staining.
Basic Cleaning Tools and Supplies
Having the right tools is essential for cleaning knotty pine walls without causing damage. Gather the following supplies
- Soft microfiber cloths or dusters for removing loose dust.
- Vacuum cleaner with a brush attachment for deep dusting of grooves and knots.
- Bucket or spray bottle for cleaning solutions.
- Mild wood cleaner, dish soap, or a vinegar-water solution.
- Soft bristle brush for scrubbing textured areas.
- Dry towels for wiping excess moisture.
Step-by-Step Cleaning Process
Cleaning knotty pine walls requires patience and attention to detail. Follow these steps to achieve a thorough clean
1. Dusting the Walls
Start by removing loose dust and debris. Use a microfiber cloth, feather duster, or vacuum with a soft brush attachment. Pay special attention to knots and grooves, as dust can accumulate more heavily in these areas. Dusting regularly helps prevent grime from embedding into the wood over time.
2. Preparing a Cleaning Solution
For sealed walls, mix a mild cleaning solution with a few drops of dish soap in warm water or a vinegar-and-water solution (1 cup vinegar to 1 gallon of water). Avoid harsh chemicals or abrasive cleaners, as these can damage the finish or alter the wood’s color. If your walls are unfinished, use only a lightly dampened cloth with plain water.
3. Spot Testing
Before applying the solution to the entire wall, test it on a small hidden area. This ensures that the cleaner does not discolor the wood or remove the finish. Allow the area to dry completely and check for any changes in color or texture.
4. Wiping the Walls
Dampen a microfiber cloth with the cleaning solution and gently wipe the walls in the direction of the wood grain. Avoid soaking the cloth or the wood. Focus on sections at a time, especially on areas around knots, which may trap dirt. For heavily textured spots, use a soft bristle brush to work the solution into crevices.
5. Drying the Wood
After cleaning, immediately dry the walls with a soft towel to prevent moisture absorption. Excess water can cause swelling, warping, or darkening of the wood. For large walls, consider drying in sections to maintain consistent results.
6. Regular Maintenance
To keep knotty pine walls looking their best, perform regular dusting weekly and spot cleaning as needed. Avoid placing items against the walls that can trap moisture or cause scratches. Using gentle cleaners and soft cloths ensures that the wood retains its natural beauty over time.
Dealing with Stains on Knotty Pine
Stains on knotty pine can be challenging due to the porous nature of the wood and the presence of knots. Here’s how to address common stains
Grease or Oil Stains
Use a mild dish soap solution to gently clean the area. For stubborn stains, a mixture of baking soda and water can be applied as a paste, left for a few minutes, and then wiped off with a damp cloth.
Water Stains
If water has left marks on finished knotty pine, buff the area gently with a soft cloth. For unfinished wood, sanding lightly and reapplying a finish may be necessary to restore uniformity.
Ink or Marker Stains
Rubbing alcohol applied sparingly to a cloth can help remove ink stains. Always test on a hidden area first to ensure the alcohol does not damage the wood finish.
Preventing Future Dirt and Damage
Preventive care is just as important as cleaning. Consider these tips
- Keep windows closed on windy days to reduce dust accumulation.
- Use furniture pads to avoid scratches on lower wall areas.
- Apply a wood polish or conditioner periodically to maintain sheen and protection.
- Address spills immediately to prevent staining.
Additional Tips for Knotty Pine Care
Over time, knotty pine may darken or yellow due to aging and exposure to sunlight. Regular cleaning and occasional refinishing can help maintain a uniform appearance. Avoid abrasive pads or steel wool, which can scratch the surface. For large or heavily soiled walls, professional wood cleaning services may be considered to achieve optimal results.
Cleaning knotty pine walls effectively requires understanding the wood’s texture, finish, and susceptibility to moisture. Using gentle cleaning solutions, soft cloths, and brushes ensures that dirt and grime are removed without damaging the natural beauty of the wood. Regular maintenance, spot cleaning, and preventive care help preserve the warmth and character of knotty pine walls for years. By following these steps and techniques, homeowners can maintain bright, clean, and inviting interiors while protecting their investment in this unique and charming wood finish.