How To Make Clotted Cream
Clotted cream is a luxurious, thick, and creamy dairy product that originates from the southwest of England, particularly Cornwall and Devon. Famous for its rich texture and slightly nutty flavor, clotted cream is a staple accompaniment for scones, cakes, and desserts, often enjoyed as part of a traditional afternoon tea. Making clotted cream at home may seem daunting, but with the right techniques and patience, you can create a creamy, indulgent spread that rivals store-bought versions. Understanding the proper process, selecting high-quality ingredients, and following careful preparation steps are essential for producing perfect clotted cream.
Ingredients Needed
The beauty of clotted cream lies in its simplicity, as it requires very few ingredients. Choosing high-quality components is crucial to achieving the best results.
Heavy Cream
The primary ingredient is heavy cream with a high fat content, ideally 35% or more. Using pasteurized but not ultra-pasteurized cream is recommended, as ultra-pasteurization can interfere with the clotting process. Avoid whipped cream or light cream, as these will not produce the rich, thick texture typical of clotted cream.
Optional Flavorings
While traditional clotted cream is made with just cream, some recipes allow for subtle flavor enhancements
- A few drops of vanilla extract to add a gentle sweetness and aroma.
- A pinch of salt to balance the richness of the cream.
Step-by-Step Process
Making clotted cream involves a slow heating and cooling process that encourages the cream to clot and form its characteristic thick layer. Patience is essential.
Step 1 Pouring the Cream
Begin by pouring the heavy cream into a shallow, heatproof dish. The dish should allow the cream to spread out to a depth of about 1-2 inches. Avoid overfilling, as the cream needs space for heat circulation during the slow cooking process.
Step 2 Gentle Heating
Traditionally, clotted cream is made using an oven at a low temperature. Preheat your oven to around 80-90°C (175-195°F). Place the dish of cream in the oven and allow it to cook slowly for 8-12 hours. During this time, the cream will form a thick, yellowish crust on the surface while the liquid beneath remains slightly thinner. This slow heating encourages the fat to rise and clot without curdling.
Step 3 Cooling
Once the cooking period is complete, carefully remove the dish from the oven and allow it to cool at room temperature for about an hour. Then, cover the dish with plastic wrap or a lid and refrigerate for at least 8 hours, preferably overnight. Cooling allows the clotted layer to firm up, making it easier to separate from the remaining liquid cream.
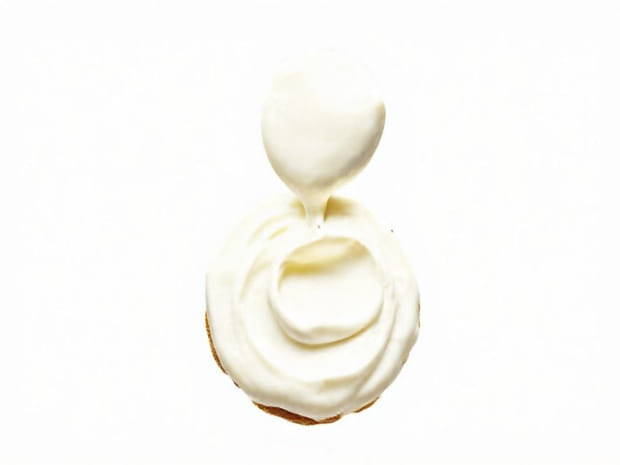
Step 4 Skimming the Clotted Cream
After refrigeration, a thick, golden layer of clotted cream should have formed on the surface. Using a spoon or spatula, carefully skim this layer off, leaving the thinner liquid cream beneath. The skimming process may need to be done gently to maintain the cream’s smooth, rich texture. The remaining liquid cream can be saved for other uses such as baking, cooking, or adding to coffee.
Step 5 Storage
Transfer the clotted cream into a clean, airtight container. Homemade clotted cream can be stored in the refrigerator for up to 5 days. Always use clean utensils when serving to maintain freshness and prevent contamination.
Tips for Perfect Clotted Cream
Achieving ideal clotted cream requires attention to detail. Here are some tips to ensure success
- Use Full-Fat CreamThe fat content is crucial for proper clotting and texture.
- Avoid StirringDuring the heating process, do not stir the cream; movement prevents the clots from forming.
- Low and Slow HeatingHigh temperatures can curdle the cream. Patience is key for achieving the thick, silky layer.
- Shallow DishUsing a shallow dish helps distribute heat evenly, promoting consistent clotting.
- Monitor RefrigerationProper cooling solidifies the clotted layer, making it easier to skim and store.
Serving Suggestions
Clotted cream is traditionally served with freshly baked scones, often accompanied by strawberry or raspberry jam. Its rich, velvety texture and mild sweetness complement baked goods beautifully. Beyond scones, clotted cream can be used in various culinary applications
Dessert Toppings
Top fresh berries, puddings, or cakes with clotted cream for a luxurious finish. It pairs exceptionally well with chocolate and fruit-based desserts.
Breakfast Enhancements
Spread clotted cream on toast, muffins, or pancakes as an indulgent alternative to butter. Drizzle with honey or sprinkle with cinnamon for extra flavor.
Cooking and Baking
In recipes that call for heavy cream, clotted cream can be used to enrich sauces, custards, or frostings, adding a unique depth of flavor and creamy consistency.
Common Mistakes to Avoid
While making clotted cream is straightforward, there are several pitfalls to watch for
- Using Ultra-Pasteurized Cream Can prevent proper clotting and result in a thin, runny texture.
- Heating Too Quickly High temperatures can curdle the cream and ruin the texture.
- Stirring During Cooking Disturbs the clot formation and reduces the thick layer.
- Insufficient Cooling Not refrigerating long enough can make skimming difficult.
- Improper Storage Using unclean utensils or containers can reduce shelf life and spoil the cream.
Making clotted cream at home is a rewarding and simple process that transforms a few high-quality ingredients into a rich, luxurious dairy product. By carefully heating heavy cream, allowing it to cool, and gently skimming the clotted layer, you can create a versatile spread perfect for scones, desserts, or breakfast dishes. Attention to temperature, patience during cooking and refrigeration, and careful handling during skimming are essential for achieving the ideal texture and flavor. Homemade clotted cream offers a delicious and indulgent alternative to store-bought versions, bringing a touch of English tradition to your kitchen and elevating any dish with its creamy, velvety richness.