Comment Dessiner Une Girafe
Learning how to draw a giraffe can be an exciting and rewarding artistic endeavor, whether you are a beginner or an experienced artist. Giraffes, with their long necks, distinctive patterns, and graceful stature, offer a unique opportunity to practice proportions, line work, and shading techniques. Drawing a giraffe allows artists to focus on both the overall structure and the intricate details, from the texture of the fur to the shape of the ossicones on the head. Understanding the anatomy and natural posture of a giraffe is essential to create a lifelike representation, while using step-by-step methods can make the process manageable and enjoyable.
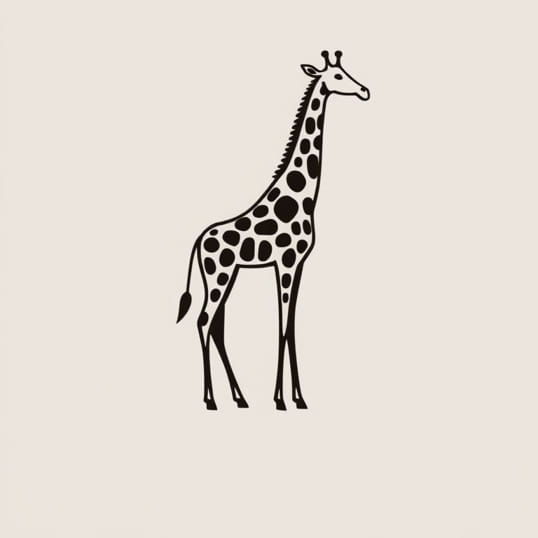
Understanding Giraffe Anatomy
Before starting a drawing, it is important to observe and understand the anatomy of a giraffe. A giraffe’s most recognizable feature is its long neck, which can make up nearly half of its body length. Its legs are similarly elongated, supporting a large but slender body. The head is small in proportion to the body, with large eyes, ears, and characteristic ossicones, which are horn-like structures covered in skin and fur. The tail ends in a tuft of hair, and the skin is patterned with unique spots that differ among individuals and subspecies. Understanding these proportions helps in creating a realistic and balanced drawing.
Fun Fact 1 Giraffe Neck Proportions
A giraffe’s neck contains only seven vertebrae, the same number as humans, but each vertebra is much longer. This anatomical fact explains why accurate neck proportions are critical when drawing a giraffe, as exaggerating or shortening the neck can make the drawing look unrealistic.
Choosing the Right Materials
Selecting suitable materials is an important step in preparing to draw a giraffe. Pencils of varying hardness, erasers, sketchbooks, and reference images are commonly used. Hard pencils, such as H or 2H, are ideal for initial sketches and outlines, while softer pencils like 2B or 4B are better for shading and detailing. Additionally, colored pencils, watercolors, or markers can be used to add life to your drawing by replicating the giraffe’s distinctive color patterns.
Fun Fact 2 Using References
Artists often use photographs or observe giraffes in zoos or safaris to capture authentic details. Observing real giraffes helps understand posture, movement, and how light interacts with the animal’s form.
Step-by-Step Guide to Drawing a Giraffe
Breaking down the drawing process into manageable steps can simplify creating a detailed giraffe illustration. Here is a recommended approach
1. Sketching Basic Shapes
Start by drawing simple geometric shapes to establish the giraffe’s structure. Use a long oval for the body, a smaller oval for the head, and elongated rectangles for the legs and neck. This foundational framework helps maintain correct proportions throughout the drawing.
2. Outlining the Neck and Head
Once the basic shapes are in place, refine the outlines of the neck and head. Pay attention to the curvature of the neck and the placement of the head on top. Add the ossicones, ears, and eyes in correct proportion. Ensuring these details are accurate contributes significantly to the giraffe’s recognizability.
3. Adding the Legs and Tail
Next, refine the legs by adding joints and musculature, remembering that giraffe legs are slender but strong. Draw the hooves at the base and add the tail with a tufted end. Maintaining the proper length and angle of the legs is crucial for a natural stance.
4. Defining the Body
Refine the body’s contours, making it look more organic and less geometric. Smooth curves and subtle muscle lines will make the giraffe appear more lifelike. Consider the perspective and posture, whether the giraffe is standing, walking, or bending to eat.
5. Detailing the Face
The face requires careful attention. Draw the eyes large and expressive, with eyelashes and highlights for realism. Add nostrils, mouth lines, and the characteristic patterns on the face. Small details, such as the shape of the ears and ossicones, help capture the giraffe’s unique personality.
6. Drawing the Spots and Patterns
Giraffe spots are irregular and unique to each animal. Use light pencil strokes to outline the general shapes of the spots before filling them in. Patterns should follow the contours of the body to create a natural appearance. Pay attention to size variations spots tend to be larger on the torso and smaller on the legs and neck.
7. Shading and Texture
Shading adds depth and dimension to your drawing. Observe how light falls on the giraffe’s body and create shadows accordingly. Use softer pencils for darker areas and lighter pencils for highlights. Adding subtle texture to the fur and mane enhances realism, while maintaining the smooth appearance of the legs and neck.
Tips for Improving Your Giraffe Drawing
- Practice drawing from multiple angles to understand how the giraffe’s shape changes with perspective.
- Use light, sketchy lines in the beginning to allow easy adjustments.
- Pay attention to proportion and scale, especially the long neck and legs.
- Incorporate reference images to study details such as fur texture and patterns.
- Experiment with different mediums, such as watercolors or colored pencils, to add vibrancy.
- Observe movement and posture to give your giraffe a dynamic and natural appearance.
Fun Fact 3 Capturing Movement
Giraffes often walk in a unique pacing motion where both legs on one side move together. Capturing this in your drawing can convey realism and help the viewer sense motion and life within the artwork.
Common Mistakes to Avoid
When drawing a giraffe, beginners may encounter several challenges. The most common mistake is misjudging proportions, especially the neck-to-body ratio. Overly stiff or unrealistic poses can make the drawing appear unnatural. Another frequent error is inconsistent spot patterns, which can distract from the overall composition. Avoid heavy outlines at the beginning, as they can limit flexibility and make corrections difficult. Regularly stepping back from your work allows you to assess proportions and adjust as needed.
Fun Fact 4 Learning from Nature
Artists who study giraffes in their natural habitat or in wildlife documentaries often achieve better results. Observing real giraffes helps understand how the body moves, how light interacts with skin patterns, and how the animal interacts with its environment.
Adding Background and Context
While a giraffe can be drawn as a standalone subject, adding a background can enhance storytelling and visual interest. Consider including trees, savannah landscapes, or other animals to provide context. Even minimal background elements can help situate the giraffe in its natural environment and make the composition more engaging.
Fun Fact 5 Environmental Interaction
Giraffes often feed on the tops of trees, particularly acacias. Drawing the giraffe interacting with branches or leaves can add dynamism and authenticity to your artwork, showing the animal’s distinctive behavior.
Learning how to draw a giraffe involves understanding anatomy, proportions, and patterns, as well as applying careful observation and patience. By breaking the process into steps sketching basic shapes, refining outlines, adding details, and shading artists can create realistic and captivating representations. Incorporating tips, avoiding common mistakes, and studying real-life references further enhances the drawing’s quality. Whether drawing for practice, educational purposes, or artistic expression, mastering giraffe drawings provides a fun and rewarding experience, allowing artists to explore both creativity and technique while celebrating one of nature’s most iconic animals.