How To Use Spirograph Ruler
Learning how to use a spirograph ruler can be both exciting and relaxing, especially if you enjoy creating artistic designs. This simple tool allows anyone, regardless of drawing skill, to produce beautiful geometric patterns that look professional and unique. Many people use it for crafts, journaling, educational activities, or simply as a creative hobby to unwind. By understanding the parts of a spirograph ruler and the techniques behind it, you can create endless variations of patterns that bring creativity to life.
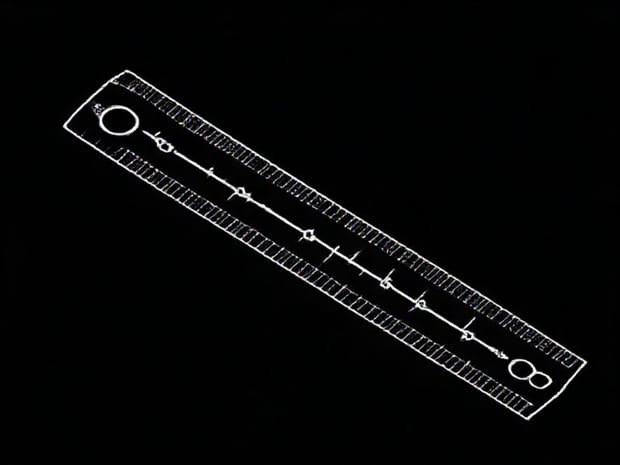
What Is a Spirograph Ruler?
A spirograph ruler is a drawing tool designed to create intricate geometric shapes using a combination of wheels and rings. The ruler usually has multiple cut-out shapes or guiding holes where pens or pencils can be inserted. By rotating one shape inside or around another, the pen follows a mathematical path to form curves, spirals, and flower-like designs. It works through simple mechanical motion but produces results that look complex and artistic.
Parts of a Spirograph Ruler
Before using a spirograph ruler, it is helpful to understand its components. Knowing each part will make it easier to experiment with patterns.
- Main Ring or FrameThe outer piece that stays fixed on the paper to hold the structure steady.
- Inner WheelsCircular or oval shapes that fit inside or around the frame. They contain small holes for inserting a pen.
- Guide HolesTiny openings in the wheels where the pen goes to start drawing.
- Pen or PencilThe writing tool that traces the design as you move the wheel.
- Paper SurfaceThe base where the design will be drawn, often secured with tape to prevent slipping.
How to Use a Spirograph Ruler Step by Step
1. Prepare Your Workspace
Start by choosing a clean, flat surface and place your paper on it. To avoid slipping, use tape to secure the paper, especially if you plan on creating multiple designs. Keep your spirograph ruler and several pens of different colors nearby for variety.
2. Position the Frame
Place the outer ring or main frame firmly on the paper. This will serve as the base that holds the wheel steady while you draw. Make sure it does not move when you begin rotating the wheel.
3. Select a Wheel
Pick one of the inner wheels. Each wheel has different hole placements, which will affect the size and shape of your final design. Smaller wheels often produce tighter curves, while larger ones create broader loops.
4. Insert the Pen
Insert your pen into one of the guide holes inside the wheel. The choice of hole changes the complexity of the design. For your first try, use a central hole to create a basic symmetrical shape.
5. Start Drawing
Hold the frame steady with one hand and gently move the wheel in a circular motion with the pen inside. The wheel should roll smoothly along the frame, and the pen will trace a repeating pattern. Continue until the design meets back at the starting point.
6. Experiment With Different Holes
Try inserting the pen into another hole on the same wheel. Each position creates a unique variation of the pattern. By experimenting, you will discover which combinations give the most intricate results.
7. Use Multiple Colors
Switching colors during the process can make the artwork more vibrant. You can layer several patterns on top of each other using different pens. This gives depth and visual interest to your spirograph art.
Creative Uses of a Spirograph Ruler
Once you know how to use a spirograph ruler, you can apply it to many creative projects. The tool is not just for children; it is popular among adults who enjoy crafting and design. Here are some ideas
- Card MakingAdd spirograph designs to greeting cards for a personal touch.
- ScrapbookingDecorate scrapbook pages with colorful patterns.
- Bullet JournalingUse spirograph designs to frame headers or decorate calendars.
- Wall ArtCreate large, layered spirograph designs and frame them as artwork.
- Educational ToolsTeach kids about geometry, symmetry, and curves in a fun way.
Tips for Better Spirograph Designs
To get the most out of your spirograph ruler, keep these tips in mind
- Use pens with fine tips for detailed patterns.
- Experiment with different wheel sizes to discover new shapes.
- Layer patterns over each other to create complex designs.
- Always keep the outer frame steady to avoid uneven lines.
- Try metallic or gel pens for added visual effects.
Why Spirograph Drawing Is Beneficial
Using a spirograph ruler is not just about making beautiful designs. It also has mental and educational benefits. The repetitive motion can be calming, similar to meditation. It encourages focus and patience, making it a great activity for stress relief. For children, it helps develop hand-eye coordination, creativity, and an appreciation for geometric concepts. Adults often find it a nostalgic and relaxing pastime.
Exploring Variations
The beauty of the spirograph ruler lies in its versatility. By combining different wheels, holes, and colors, the possibilities are nearly endless. Some people even experiment with unusual surfaces like fabric or wood to expand the artistic potential. Others integrate spirograph designs into digital art by scanning and enhancing their work on a computer.
Mastering how to use a spirograph ruler opens up a world of creativity. From simple geometric shapes to layered, colorful masterpieces, the tool provides endless opportunities for artistic expression. Whether you are making handmade cards, decorating your journal, or just relaxing with a creative hobby, spirograph rulers offer a timeless way to enjoy art and geometry together. With practice and imagination, each design you create will be unique, turning ordinary lines into extraordinary patterns.