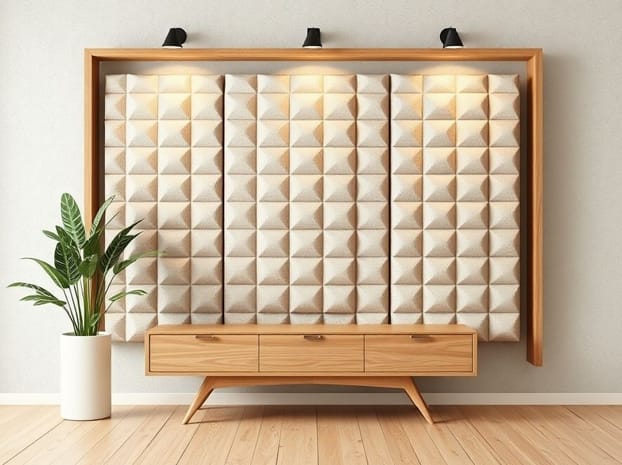
Diy Sound Absorbing Panels
Creating a quiet and comfortable environment is becoming increasingly important in homes, offices, and creative spaces, especially as noise pollution continues to rise. One effective way to reduce unwanted sound is by using sound-absorbing panels, which are designed to minimize echoes, dampen noise, and improve acoustics. While professional acoustic panels can be expensive, DIY sound absorbing panels offer an affordable and customizable solution. With the right materials, techniques, and understanding of sound dynamics, anyone can create panels that enhance audio quality, reduce noise, and add a visually appealing touch to a room.
Understanding DIY Sound Absorbing Panels
DIY sound absorbing panels are homemade or self-assembled devices that capture and reduce sound reflections within a space. Unlike soundproofing, which blocks sound from entering or leaving a room, sound absorption focuses on improving the acoustics inside a space. These panels are particularly useful for recording studios, home theaters, offices, or any environment where controlling noise and reverberation is essential. By absorbing mid to high-frequency sounds, DIY panels create a more controlled acoustic environment without the need for expensive professional solutions.
Materials Needed for DIY Panels
The success of your DIY sound absorbing panels largely depends on the materials you choose. Common materials include
- Acoustic FoamLightweight, porous foam that efficiently absorbs sound waves. It comes in various shapes like wedges, pyramids, or egg crates.
- Fiberglass InsulationDense fiberglass boards can absorb a broad range of frequencies and are commonly used in professional panels.
- Mineral WoolSimilar to fiberglass, mineral wool is fire-resistant and provides excellent sound absorption.
- Fabric CoversBreathable fabrics help contain the insulation material while adding a decorative element. Natural fabrics like cotton or linen work best.
- Wood FramesPlywood or MDF frames provide structure and durability, keeping the panels rigid and easy to mount.
Tools Required
- Measuring tape or ruler
- Utility knife or saw for cutting insulation
- Staple gun for securing fabric
- Screws or mounting hardware for wall attachment
- Spray adhesive (optional) for foam attachment
Step-by-Step Guide to Making DIY Sound Absorbing Panels
Step 1 Measure and Plan
Begin by determining the size and number of panels required for your space. Consider areas where sound reflections are most problematic, such as opposite walls, corners, and above desks or seating areas. Standard panel sizes often range from 2 feet by 4 feet to smaller 1-foot squares, but panels can be customized based on room dimensions and aesthetic preferences.
Step 2 Construct the Frame
Using plywood or MDF, build rectangular frames to hold the insulation material. Ensure the frames are sturdy but not excessively heavy. Frames should have an open back to allow sound to pass through and be absorbed by the insulation.
Step 3 Insert Insulation Material
Cut the chosen insulation material, such as fiberglass or mineral wool, to fit snugly inside the frame. Ensure there are no gaps, as these can reduce the effectiveness of sound absorption. For foam panels, you can glue the foam directly to a thin backing board before framing.
Step 4 Cover with Fabric
Wrap the panel with a breathable fabric, securing it tightly on the back with a staple gun. Avoid thick, non-porous fabrics, as they may reflect sound instead of absorbing it. Choosing a decorative fabric can also enhance the aesthetic appeal of your space while maintaining functionality.
Step 5 Mount the Panels
Install the panels on walls using screws, brackets, or specialized adhesive strips for lightweight panels. Focus on placing panels at first reflection points, such as the wall directly across from speakers or the area behind recording microphones, to maximize acoustic improvement. For larger rooms, consider adding ceiling panels or corner bass traps to absorb low-frequency sound.
Tips for Optimizing Panel Performance
- Use multiple panels strategically across the room for even sound absorption.
- Combine different materials to capture a wider frequency range.
- Ensure panels are at least two inches thick to enhance absorption efficiency.
- Experiment with placement, as small adjustments can significantly affect acoustics.
- Consider painting or fabric choices that complement room decor without compromising breathability.
Benefits of DIY Sound Absorbing Panels
There are several advantages to creating your own sound absorbing panels rather than buying pre-made ones
- Cost-EffectiveDIY panels are generally much cheaper than commercial alternatives, especially when using readily available insulation materials.
- CustomizableSize, shape, thickness, and fabric can all be tailored to your specific room and aesthetic preferences.
- Effective Acoustic ControlProperly designed DIY panels can significantly reduce echo, flutter, and overall noise, improving audio clarity.
- Creative ExpressionFabric choices and patterns allow for decorative designs that blend seamlessly with your room’s style.
Common Mistakes to Avoid
Even with DIY panels, certain pitfalls can reduce their effectiveness
- Using non-breathable fabrics that block sound absorption.
- Installing panels unevenly or ignoring reflection points in the room.
- Choosing insulation that is too thin or sparse, resulting in poor performance.
- Overlooking low-frequency absorption, which may require thicker panels or bass traps.
DIY sound absorbing panels provide an affordable, versatile, and effective solution for improving room acoustics and reducing noise. By carefully selecting materials, constructing sturdy frames, and strategically placing panels, anyone can create a space that is more comfortable, quiet, and suitable for listening, recording, or working. Whether for a home studio, office, or entertainment area, these panels allow for both functional and aesthetic customization, delivering significant improvements in sound quality without the expense of professional products. With attention to detail and proper planning, DIY sound absorbing panels can transform any space into a more serene and acoustically optimized environment.