How To Celtic Knot
Celtic knots are a beautiful and timeless form of art that have been used for centuries in decorative designs, jewelry, tattoos, and manuscripts. These intricate patterns are known for their endless loops and interlacing lines, symbolizing eternity, unity, and the interconnectedness of life. Learning how to create a Celtic knot can be both a rewarding artistic pursuit and a way to connect with cultural history. The process involves understanding the basic structure, practicing the weaving techniques, and applying your creativity to craft unique designs that flow seamlessly.
Understanding Celtic Knots
Before attempting to create a Celtic knot, it is important to understand the foundational elements that make these patterns so distinctive. A Celtic knot is characterized by continuous lines that weave over and under themselves, creating loops without a beginning or end. The patterns often carry symbolic meaning, with different knots representing concepts like love, friendship, protection, or the eternal cycle of life. Familiarity with the basic forms will help you create more complex and personalized designs.
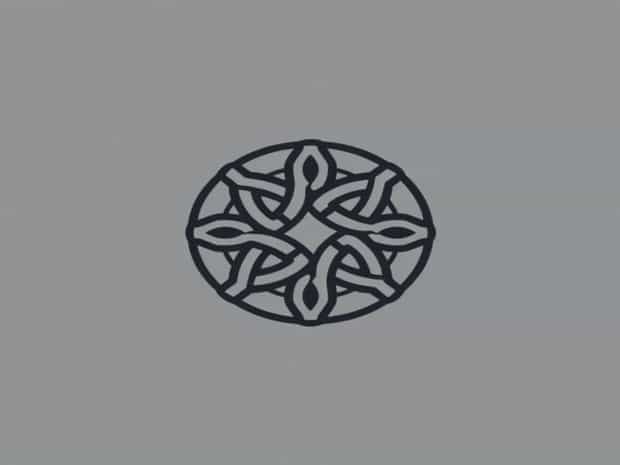
Basic Types of Celtic Knots
There are several types of Celtic knots, each with unique structures and symbolism. Understanding these basic types will help you start designing your own knots
- TriquetraAlso known as the Trinity knot, it is made of three interlacing loops and often represents spiritual concepts or the three stages of life.
- Quaternary KnotThis four-looped design symbolizes balance and harmony.
- Shield KnotTraditionally used for protection, this knot features four loops forming a square-like shape.
- Endless KnotA continuous loop design that symbolizes eternity and interconnectedness.
Materials and Tools Needed
Creating Celtic knots can be done on paper, digitally, or through physical mediums like leather, metal, or fabric. Depending on your preferred medium, gather the following tools
For Drawing
- Pencil and eraser for sketching outlines
- Ruler or grid paper to maintain symmetry
- Fine-tip pens or markers for inking
For Physical Crafts
- Leather strips, wire, or rope for 3D knots
- Scissors and glue for assembly
- Optional tools like pliers for wire or needles for fabric
Step-by-Step Guide to Creating a Basic Celtic Knot
Learning how to create a Celtic knot starts with understanding the weaving pattern. The steps below outline a method for beginners
Step 1 Draw a Grid
Start by drawing a square grid on your paper. The grid will serve as a guide to maintain symmetry and spacing for the knot’s loops. The size of the grid can be adjusted based on how large or intricate you want your knot to be.
Step 2 Outline the Knot Path
Using your grid as a reference, draw the continuous path of the knot. Start by marking where lines will intersect, ensuring that each line weaves alternately over and under the previous line. This over-under pattern is essential for achieving the characteristic Celtic knot appearance.
Step 3 Connect the Loops
Once the path is outlined, begin connecting the loops to create the flowing, intertwined look. Pay attention to symmetry and make sure the ends meet seamlessly to form an endless loop. Adjust the curves as needed to create a smooth and balanced design.
Step 4 Refine the Design
After connecting the loops, refine your knot by erasing unnecessary lines and smoothing out intersections. Make sure the weaving pattern remains consistent, and the knot looks continuous without any breaks.
Step 5 Ink and Finalize
Once satisfied with the pencil sketch, use a fine-tip pen or marker to ink the design. Inking brings clarity to the pattern and prepares it for use in other applications such as coloring, engraving, or digital design.
Tips for Advanced Celtic Knot Designs
After mastering basic knots, you can experiment with more complex designs and creative variations
Combine Multiple Knots
Integrate several knots into a single composition. Layering different knots adds depth and intricacy, creating a visually striking pattern. Ensure that each knot maintains its continuous flow for a cohesive design.
Vary Line Thickness
Using different line weights can create contrast and highlight specific parts of the knot. Thicker lines can emphasize the main loops, while thinner lines can be used for decorative details.
Incorporate Color
Adding color enhances the visual appeal of your Celtic knot. Traditional color palettes often include earthy tones, greens, and golds, but you can use any color scheme that reflects your artistic vision.
Explore 3D Mediums
Try creating Celtic knots using materials like leather, rope, wire, or clay. Three-dimensional knots bring a tactile dimension to the design and can be used in jewelry, home décor, or wearable art.
Applications of Celtic Knots
Celtic knots can be applied in a variety of ways, making them versatile for both artistic and functional purposes
- Decorative artwork and illustrations
- Jewelry design, including bracelets, pendants, and rings
- Tattoo designs
- Textile patterns and embroidery
- Book illustrations or manuscript decoration
Practice and Patience
Creating Celtic knots requires patience and attention to detail. Begin with simple designs and gradually move to more intricate patterns. Regular practice improves precision, helps develop a personal style, and builds confidence in executing complex weaving patterns. Mistakes are part of the learning process and often lead to creative solutions and unique variations of traditional knots.
Learning how to Celtic knot is an enriching artistic endeavor that blends creativity, history, and symbolism. By understanding the basic structures, practicing weaving techniques, and experimenting with materials and designs, anyone can create beautiful and meaningful knots. Whether used for personal projects, decorative arts, or professional design work, mastering Celtic knots offers endless opportunities for artistic expression and cultural appreciation.