How To Shape Almond Nails
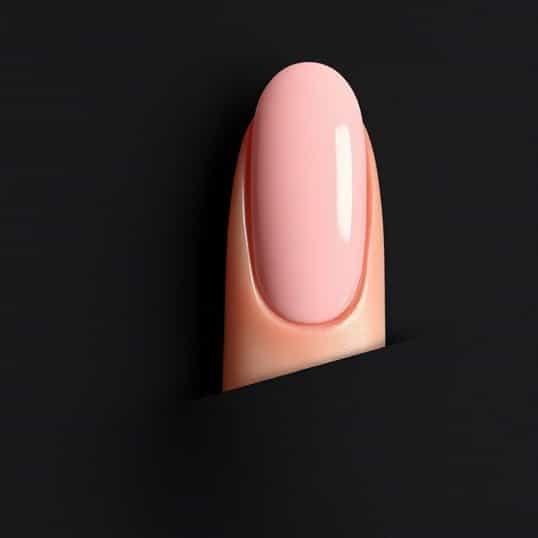
Shaping almond nails has become a popular trend in nail art, admired for its elegant and elongating effect on the fingers. Almond nails are characterized by their tapered sides and rounded tips, resembling the shape of an actual almond. This nail shape is flattering for almost every hand type, providing a sophisticated and feminine look. Whether you are preparing for a special occasion or simply want a polished everyday style, learning how to shape almond nails properly can elevate your manicure and ensure long-lasting results. The process involves careful trimming, filing, and attention to nail health to achieve the perfect almond silhouette.
Understanding Almond Nails
Almond nails are a versatile and elegant choice that blends the softness of rounded nails with the elongating effect of pointed tips. Unlike stiletto nails, which are sharply pointed and dramatic, almond nails are subtle and practical for daily wear. They are ideal for individuals who want a chic appearance without compromising on durability. Almond nails can be enhanced with nail polish, nail art, or even gel and acrylic extensions, making them a favorite among nail enthusiasts and professionals alike.
Characteristics of Almond Nails
- Tapered sides that gradually narrow toward the tip
- Rounded or softly pointed tip resembling an almond
- Elongates the fingers and creates a graceful look
- Durable compared to sharply pointed stiletto nails
- Versatile for various nail designs and lengths
Preparing Your Nails
Before shaping almond nails, it is essential to prepare your nails properly. Start by cleaning and trimming the nails to a manageable length. Remove any old nail polish and wash your hands thoroughly. Pushing back the cuticles and gently buffing the surface of the nails will help create a smooth base for shaping. Nail health is crucial, so consider applying a strengthening base coat if your nails are weak or prone to breaking. Proper preparation ensures that the shaping process goes smoothly and reduces the risk of damaging your nails.
Preparation Steps
- Remove old nail polish using a gentle remover
- Trim nails to a uniform length
- Wash hands thoroughly and dry completely
- Push back cuticles and remove any excess skin
- Buff the surface of nails for smoothness
- Apply a strengthening base coat if needed
Tools Needed for Shaping Almond Nails
Having the right tools is essential for achieving a professional-looking almond nail shape. A high-quality nail file, preferably a fine-grit emery board, is crucial for controlled shaping. Nail clippers, cuticle pushers, and buffers will also help in preparation. For those using extensions, additional tools like a nail file with varying grits and a nail brush are recommended. Using the correct tools not only ensures precision but also prevents unnecessary splitting or breaking of the nails during shaping.
Essential Tools
- Fine-grit nail file or emery board
- Nail clippers for initial trimming
- Cuticle pusher or remover
- Buffer for smoothing nail surface
- Nail brush for cleaning debris
- Optional Tools for gel or acrylic extensions
Step-by-Step Guide to Shaping Almond Nails
Shaping almond nails requires patience and precision. Start by trimming the nails to a slightly longer length than desired, as almond shapes look best when elongated. File the sides of the nails gradually toward the center, creating a soft taper. Focus on symmetry for each nail, ensuring the shape is consistent across both hands. Use gentle, controlled strokes to avoid splitting. The tip should be rounded and narrow without becoming too sharp, maintaining the characteristic almond shape. Buff the edges lightly to smooth out any rough areas and create a polished finish.
Shaping Process
- Trim nails to a slightly longer length than the final desired shape
- File the sides toward the center to create a soft taper
- Maintain symmetry across all nails
- Use gentle strokes to prevent splitting or cracking
- Round the tip softly for the almond effect
- Buff edges for a smooth, polished look
Tips for Maintaining Almond Nails
Once your nails are shaped, maintaining them is key to keeping the almond look intact. Regular filing will help prevent snags and maintain the tapered shape. Avoid using nails as tools, as almond nails can be longer and more prone to bending or breaking. Moisturizing your hands and cuticles daily strengthens the nails and promotes healthy growth. Using a base coat before applying nail polish and a top coat afterward adds durability and shine, extending the life of your manicure.
Maintenance Tips
- File regularly to maintain the almond shape
- Avoid using nails as tools to prevent damage
- Moisturize nails and cuticles daily
- Apply a base coat before nail polish for protection
- Finish with a top coat to add shine and durability
- Consider periodic professional manicures for best results
Enhancing Almond Nails with Polish and Art
Almond nails provide a versatile canvas for nail polish and designs. Soft, neutral colors highlight the elegant shape, while bold or metallic shades make a statement. Nail art, such as minimalistic lines, floral patterns, or rhinestones, can be incorporated to create personalized designs. Gel or acrylic overlays offer additional strength and allow for intricate designs without compromising the shape. Whether opting for a classic French tip or modern geometric patterns, almond nails enhance the aesthetic appeal of any manicure.
Polish and Art Ideas
- Neutral shades for a classic, sophisticated look
- Bold colors for a modern, eye-catching style
- French tip designs to highlight the almond shape
- Minimalistic or geometric nail art for creativity
- Rhinestones or embellishments for special occasions
- Gel or acrylic overlays for durability and design flexibility
Common Mistakes to Avoid
While shaping almond nails, it is important to avoid common mistakes that can damage the nails or distort the shape. Over-filing can weaken the nail structure, leading to breakage. Filing too sharply at the tip results in a stiletto-like appearance rather than a soft almond shape. Neglecting nail health or skipping base coats can cause chipping or discoloration. Following proper techniques, using the right tools, and maintaining nail care routines help prevent these issues and ensure a professional, elegant almond nail look.
Mistakes to Avoid
- Over-filing nails, causing weakening and breakage
- Creating overly sharp tips instead of a soft almond shape
- Neglecting cuticle and nail care routines
- Skipping base or top coats during polish application
- Inconsistent filing, leading to uneven shapes
Shaping almond nails requires patience, attention to detail, and proper care. By understanding the characteristics of almond nails, preparing your nails, using the right tools, and following a step-by-step shaping process, anyone can achieve a beautiful and elegant look. Maintaining the nails through regular filing, moisturizing, and protective coatings ensures that the almond shape remains flawless. With these techniques, almond nails can enhance the appearance of your hands, provide a versatile base for polish and art, and offer a timeless and stylish manicure for any occasion.