Easy Rube Goldberg Machine Ideas 5 Steps
Rube Goldberg machines are a fun and creative way to perform simple tasks in a complicated and entertaining manner. They use a chain reaction of events where one action triggers the next, often in surprising and imaginative ways. While some machines are extremely complex, you can start with easy Rube Goldberg machine ideas that involve just five steps. These smaller machines are perfect for beginners, classroom projects, or home experiments. Focusing on five steps makes the design manageable while still demonstrating the fascinating concept of cause and effect.
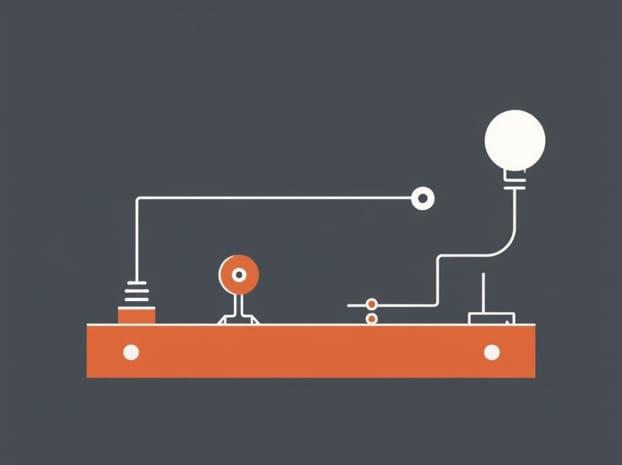
Understanding a Rube Goldberg Machine
A Rube Goldberg machine is named after the American cartoonist Rube Goldberg, who was famous for drawing humorous devices that performed simple tasks in overcomplicated ways. The goal of these machines is not efficiency but creativity, entertainment, and demonstrating the principles of physics like momentum, gravity, and energy transfer.
Key Elements of a Simple Machine
- TriggerThe initial action that starts the chain reaction.
- Intermediate StepsA series of actions or objects that transfer motion or energy from one step to the next.
- Final TaskThe ultimate action the machine is designed to complete, like ringing a bell or popping a balloon.
- ConnectionsHow each step interacts with the next, often using ramps, pulleys, levers, or dominoes.
- TimingEnsuring that each step happens in sequence without interruptions.
Easy 5-Step Rube Goldberg Machine Ideas
Starting with just five steps allows beginners to design a fun and functional machine without feeling overwhelmed. Below are several ideas that are simple, safe, and use common household materials.
1. Ball Rolling to Knock Down Dominoes
In this setup, a small ball can roll down a ramp to knock over a series of dominoes. The final domino could hit a toy car or a pencil, which triggers the next step.
- Step 1 Release a ball from a tilted ramp.
- Step 2 Ball hits a line of dominoes.
- Step 3 Last domino hits a toy car.
- Step 4 Toy car rolls and pulls a string attached to a cup.
- Step 5 Cup tips over and pours water into a container, completing the task.
2. Cup and Marble Chain Reaction
This idea uses cups, marbles, and strings to transfer motion. It is visually engaging and teaches balance and coordination.
- Step 1 Lift a lever to release a marble.
- Step 2 Marble rolls into a cup on a ramp.
- Step 3 Cup tips over and spills marbles onto a track.
- Step 4 Marbles roll down and hit a small ball.
- Step 5 Ball hits a switch to turn on a small fan or light.
3. Pulley System with Books
A simple pulley system can be incorporated for a five-step machine using household objects like books, strings, and small weights.
- Step 1 Release a string attached to a weight.
- Step 2 Weight falls and pulls another string over a pulley.
- Step 3 Pulley movement lifts a small book.
- Step 4 Book tips over a small ball or toy.
- Step 5 Ball hits a target, like ringing a bell or knocking over another object.
4. Balloon Popping Trigger
This machine uses air pressure and a balloon for a satisfying pop at the final step.
- Step 1 Pull a string to release a rolling ball.
- Step 2 Ball hits a domino chain.
- Step 3 Last domino knocks over a small ramp.
- Step 4 Ramp releases a pin or needle attached to a stick.
- Step 5 Pin pops a balloon to complete the sequence.
5. Toy Car Ramp and Lever
This idea combines ramps and levers to make a smooth chain reaction that ends with a small task.
- Step 1 Drop a small ball onto a ramp.
- Step 2 Ball hits a lever.
- Step 3 Lever launches a toy car.
- Step 4 Toy car rolls into a stack of blocks.
- Step 5 Blocks fall onto a switch, turning on a light or completing another small task.
Tips for Building a 5-Step Rube Goldberg Machine
Even with only five steps, careful planning is necessary to ensure the machine works correctly.
1. Start Simple
Use household items like marbles, dominoes, ramps, cups, and toy cars. Avoid overly complex setups at the beginning.
2. Test Each Step Separately
Before connecting all five steps, test each part individually to make sure it works as expected.
3. Consider Timing and Spacing
Make sure objects have enough space to move and that one step triggers the next smoothly without stopping prematurely.
4. Safety First
Do not use sharp objects or heavy weights. Ensure that children are supervised if they are building the machine.
5. Document Your Design
Draw a simple diagram or take notes. This will help in troubleshooting if any part of the sequence fails.
Educational Benefits
Creating an easy 5-step Rube Goldberg machine is not only fun but also educational. It teaches basic physics, problem-solving, engineering, and creativity. Students learn about gravity, momentum, and energy transfer while practicing patience and critical thinking. It also encourages teamwork and communication when done in groups.
Classroom Applications
- Demonstrating physics concepts like force and motion.
- Encouraging creative problem solving and engineering skills.
- Helping students understand cause-and-effect relationships.
Home Projects
At home, these machines are a great way for children and adults to engage in STEM activities. They promote hands-on learning and can even become fun competitions to see who can design the most creative machine.
Easy Rube Goldberg machine ideas with five steps offer a perfect balance between simplicity and creativity. Using household items like balls, ramps, dominoes, cups, and toy cars, beginners can design entertaining machines that demonstrate cause-and-effect principles. By planning each step carefully, testing individual components, and focusing on timing, anyone can create a fun and educational chain reaction. Whether for school projects, home learning, or just a fun experiment, these machines inspire creativity, problem-solving, and an appreciation for the complexity hidden in seemingly simple tasks. Starting with five steps makes the project manageable, and it provides a strong foundation for more complex designs in the future.