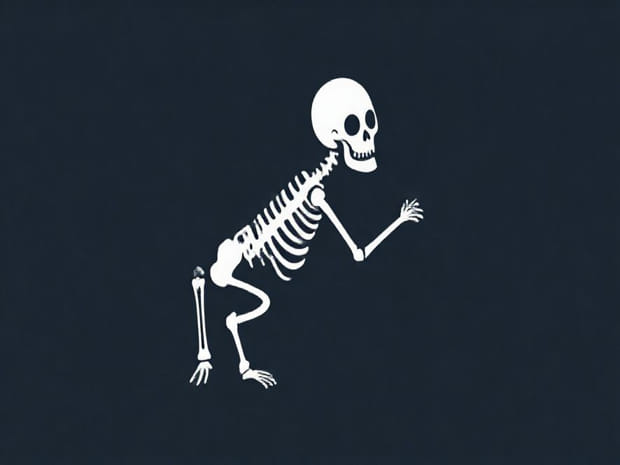
How To Draw A Skeleton
Drawing a skeleton is an engaging way to study human anatomy, improve your artistic skills, and create striking artwork. Skeletons are composed of complex structures that support the human body, and understanding these forms can help artists accurately depict movement, proportion, and posture. Learning how to draw a skeleton can be both educational and creative, allowing you to explore details such as the skull, ribcage, spine, and limbs. By following a systematic approach, even beginners can create detailed and realistic skeleton illustrations while improving their understanding of human anatomy for future art projects.
Gathering Materials for Skeleton Drawing
Before beginning, it is important to gather the necessary tools to ensure a smooth drawing process. Basic materials include pencils, paper, and an eraser, but additional tools can help enhance detail and precision. Using different grades of pencils allows for varied line thickness and shading, which is particularly useful for emphasizing bone structure and depth. Having a clean workspace with adequate lighting will also make it easier to focus on intricate details of the skeleton.
- Pencils HB for sketching, 2B or 4B for darker lines and shading.
- Eraser Preferably a soft eraser to correct mistakes without damaging the paper.
- Paper Smooth or slightly textured paper works best for detailed drawings.
- Optional Ruler or compass for accurate proportions of bones.
- Reference images Anatomical charts or 3D skeleton models can guide accuracy.
Step 1 Understanding Skeleton Proportions
Before sketching, familiarize yourself with the basic proportions of the human skeleton. The human body is roughly seven to eight heads tall, and understanding this ratio helps maintain realistic dimensions. The skull, ribcage, pelvis, and limbs each have specific relative sizes and positions. Observing reference images or anatomical models can help you identify how bones connect and articulate. This knowledge is essential for creating a balanced and anatomically correct skeleton drawing.
Step 2 Drawing the Skull
The skull is the most recognizable part of the skeleton and a good starting point for your drawing. Begin with an oval shape for the cranium and add the jawbone as a smaller, slightly tapered oval below it. Sketch the eye sockets as large, rounded shapes, the nasal cavity as a smaller triangle, and the cheekbones extending outward. Paying attention to the proportions of these features will ensure that the skull looks realistic. Light lines can help refine shapes before committing to darker outlines.
Step 3 Sketching the Spine and Ribcage
Next, draw a vertical line extending downward from the base of the skull to serve as the spine’s central axis. The spine should have a slight natural curve to reflect human posture. Add small ovals or rectangles along this line to represent individual vertebrae. For the ribcage, draw an oval or slightly rounded rectangular shape around the upper spine. Sketch horizontal lines curving gently from the spine outward to indicate ribs, maintaining symmetry on both sides. Make sure the ribcage tapers slightly toward the lower ribs to resemble natural human anatomy.
Step 4 Drawing the Pelvis and Hips
The pelvis connects the spine to the legs and plays a critical role in proportion. Begin with a wide, slightly oval shape for the pelvic bones. Add the hip sockets where the femur bones will connect. The width of the pelvis should align with the ribcage and shoulder width to maintain realistic proportions. Keep your lines light at first, refining them later to include details such as the sacrum and pubic arch. Proper placement of the pelvis ensures the legs attach naturally and the skeleton appears balanced.
Step 5 Adding Arms and Legs
Draw the arms using cylindrical shapes for the humerus, radius, and ulna. The hands can be sketched as simplified shapes with elongated fingers before adding more detail. For the legs, use elongated cylinders for the femur, tibia, and fibula. Sketch the feet with basic shapes, gradually refining toes and ankle bones. Pay attention to joint connections at the shoulders, elbows, hips, and knees to maintain realistic articulation. Using reference images can be extremely helpful for ensuring anatomical accuracy.
Step 6 Refining Bone Details
After completing the basic structure, add details to enhance the realism of your skeleton drawing. Highlight areas such as the collarbones, shoulder blades, knee caps, and wrist bones. Add subtle curves and indentations to the bones to reflect their natural shapes. Incorporate spacing between bones where appropriate to suggest depth and dimensionality. This stage requires patience, as attention to these details distinguishes a flat sketch from a lifelike skeleton illustration.
Step 7 Shading and Depth
Shading is essential for giving your skeleton a three-dimensional appearance. Identify the light source and apply shadows accordingly. Darken areas beneath the ribcage, pelvis, and limbs, while leaving highlights where light naturally falls on bones. Use varied pencil pressure to create gradients, emphasizing depth and structure. Adding crosshatching or subtle texture can further enhance the bones’ realistic appearance, making your drawing visually compelling.
- Apply darker shading to areas obscured from light.
- Use lighter strokes for highlighted regions of bones.
- Incorporate subtle textures to mimic the surface of bones.
- Gradually build shadows to maintain a smooth gradient.
- Check proportions and alignment after shading to ensure consistency.
Step 8 Reviewing and Final Touches
Once you have completed the skeleton drawing, review the overall proportions and details. Erase any unnecessary construction lines and refine the edges of bones for a clean look. Consider adding background elements or context if desired, such as a subtle floor or environment to place the skeleton. Take a step back to evaluate symmetry, anatomical accuracy, and overall balance. Minor adjustments at this stage can greatly enhance the quality and realism of the final drawing.
Tips for Practice and Improvement
Drawing skeletons requires both observation and practice. Start with simplified skeleton sketches and gradually increase complexity as your understanding of anatomy improves. Use reference images or 3D models to study joint connections, proportions, and variations in bone structures. Experiment with different poses to challenge yourself and expand your skill set. Consistent practice will improve accuracy, control, and confidence, allowing you to create dynamic and anatomically correct skeleton drawings.
- Begin with simplified sketches before adding full detail.
- Study anatomy references for accuracy.
- Experiment with different poses and angles.
- Practice shading techniques to create depth.
- Refine proportions and details with each iteration.
Drawing a skeleton is a valuable exercise for artists seeking to understand human anatomy and improve their artistic skills. By following step-by-step instructions starting with basic shapes, refining the skull, spine, ribcage, pelvis, and limbs, and finally adding details and shading you can create a realistic and visually striking skeleton illustration. Attention to proportions, joint placement, and bone texture ensures anatomical accuracy, while shading and depth bring the drawing to life. With practice, patience, and observation, drawing skeletons becomes not only a learning tool but also an enjoyable and rewarding artistic experience.
Mastering skeleton drawings enhances your ability to depict the human form in various poses, compositions, and artistic projects. Whether used for educational purposes, creative artwork, or character design, understanding the structure and proportions of the skeleton is an essential skill for any artist. Regular practice, study of reference materials, and attention to detail will allow you to create skeleton drawings that are both accurate and expressive, strengthening your overall artistic abilities.